Setting Up Spectrawiz and Collecting Data:
Raman Tutorials
Installing the Spectrawiz Software:
Unless the software has been added to the computers common programs, you may need to reinstall the software on each startup. You will need to contact IT to gain admin privileges on the computer. Otherwise you won't be able to install the software.
The software is included on the Stellarnet thumb drive. Open the thumb drive folder and navigate to the stellarnet software folder. The manuals for the spectrometer are also located in the thumb drive (Shown in blue).

Figure 2: Thumb drive folder.
Double click the .exe file. You will briefly see a few windows pop up and then close. The command prompt window should appear and ask you to press any key. The software should now be installed...

Figure 3: Installing the software.
Plug the USB cable from the back of the spectrometer into the computer.
Navigate to the Desktop and open the stellarnet software. You will see the Spectrawiz interface appear.
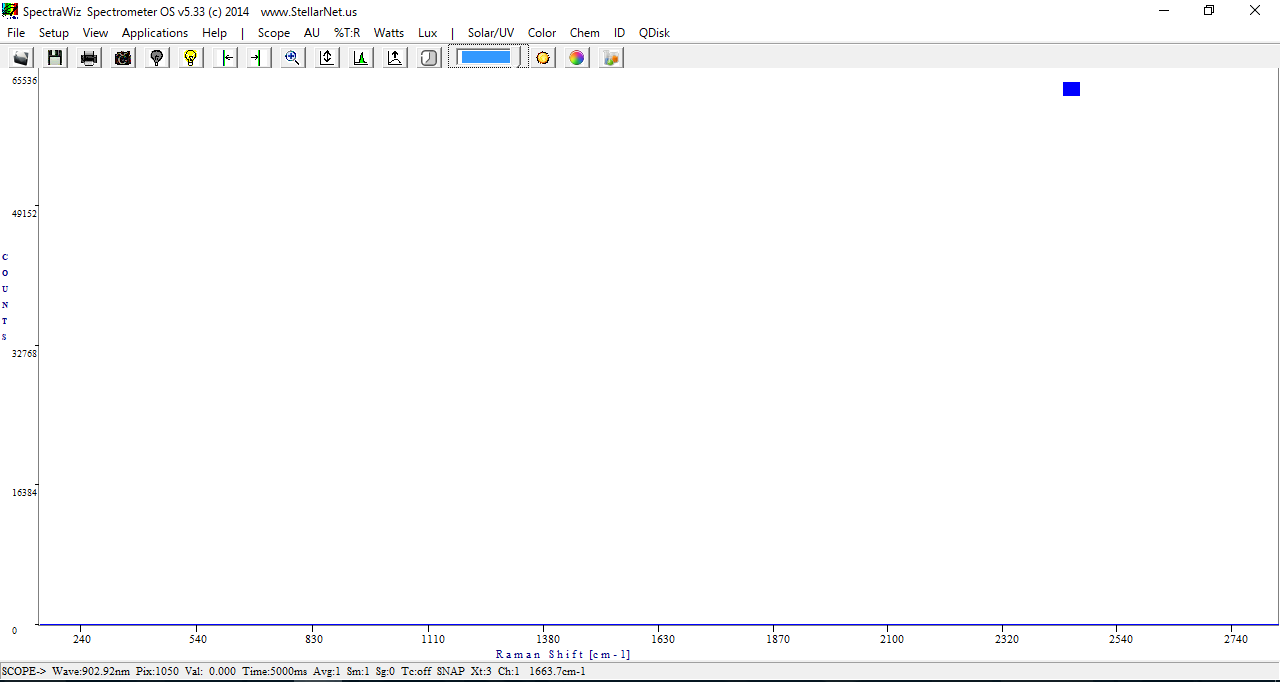
Figure 4: Spectrawiz interface.
A few settings will need to be modified/verified.
Navigate to Setup>Raman Laser Wavelength. Ensure that the wavelength is set to 785nm.
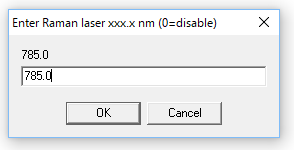
Figure 5: Setting Wavelength.
Now go Setup>Unit Calibration Coefficients. Select Channel 1 and ensure that the coefficients match those on the bottom of the spectrometer.
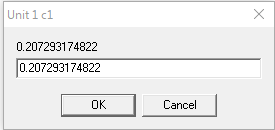
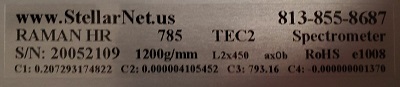
Figure 6: Setting Calibration Coefficients.
Recording a Signal:
We will now be working with the spectrometer and laser source, directly. If the laser is plugged in, you should assume that it could fire at any moment. However, the laser source also has a built in battery (which should not be enabled). When the laser is not in use, always ensure that the key on the back of the laser source is removed and the safety interlock is removed from the laser source. This should ensure that the laser won't fire, even if the battery is enabled. Just as a safety precaution, wear the laser goggles if the laser source is plugged in or has the key inserted.
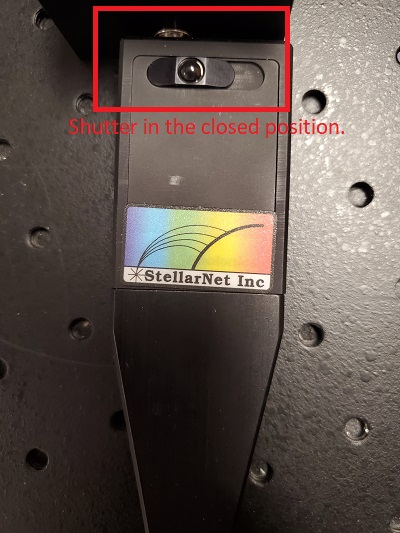
At this moment, everything should be unplugged (except the usb connection), the key and safety interlock removed from the laser source, and the Raman probe shutter should be closed (red dot isn't visible).

The spectrometer and computer should still be connected via USB. Nothing should be plugged in yet!
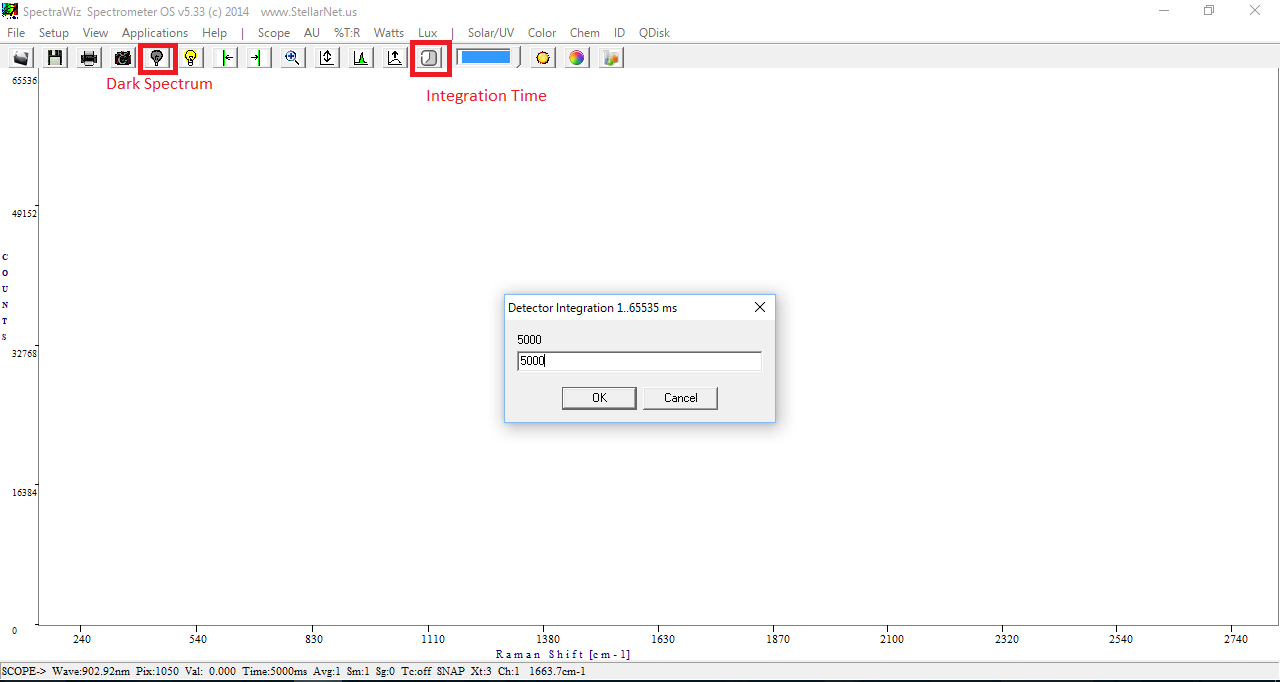
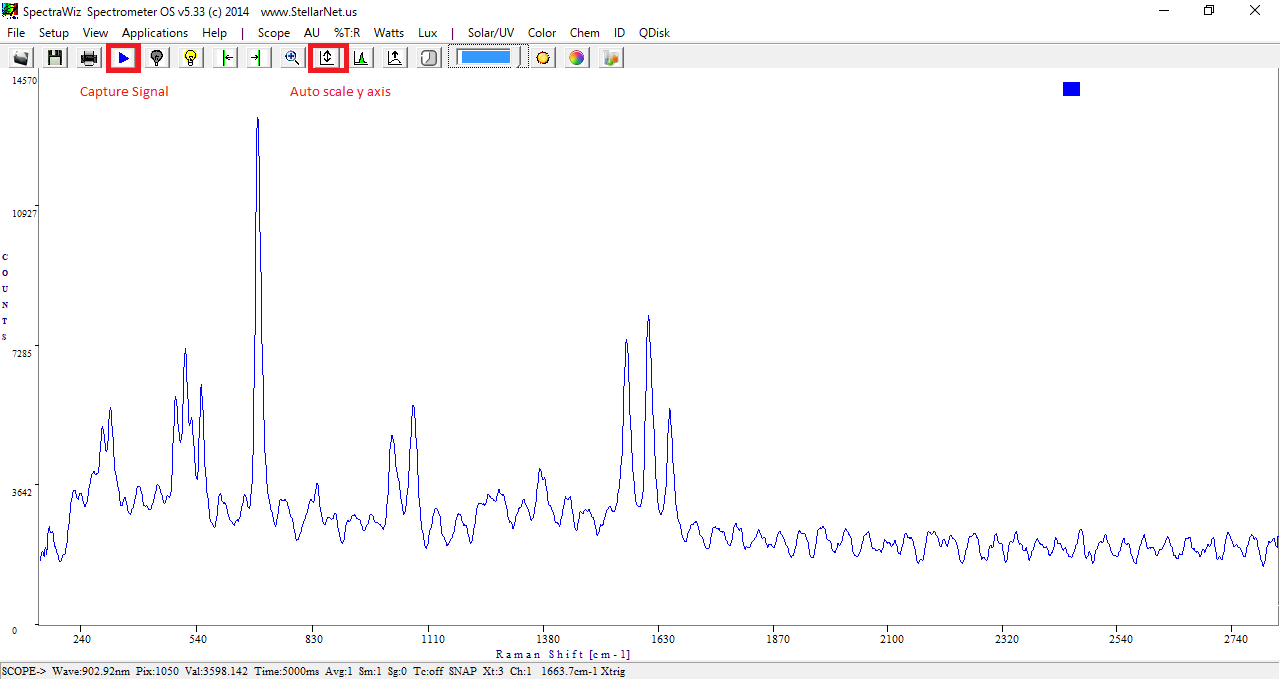
Click the integration time button on the Spectrawiz interface and set it to 5000 ms. This will set how long the software collects data.
Now put the laser goggles on. Plug the 5V dc barrel jack into the back of the spectrometer. Press the Dark Spectrum button. The data should now look like a horizontal line. It will soon revert back to noise.
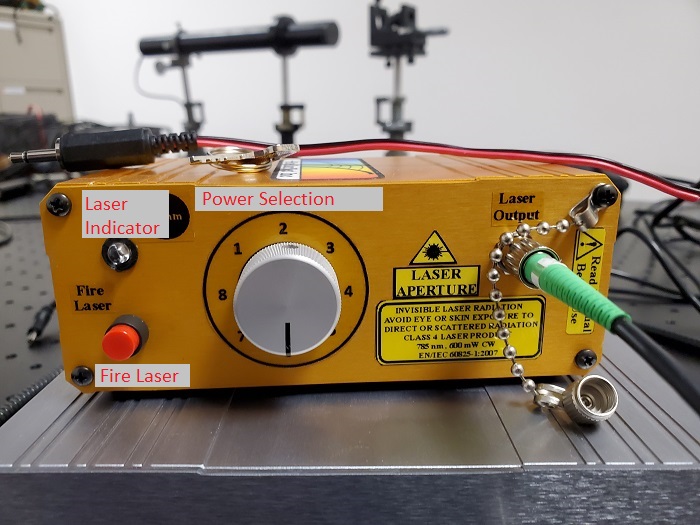
Set the laser source power setting to 6.
Now we will power on the laser and begin data collection.
Start by plugging the 5V DC barrel jack into the back of the laser source and the spectrometer. Insert the safety interlock and the on/off key.
Turn the on/off key to the "on" position (horizontal). The laser is now ready to fire.
Slide the shutter on the Raman Probe so that the red dot is visible. Press and hold the "fire laser" button until you see the signal appear in spectrawiz. It shouldn't take much longer than the integration time for the signal to appear. If the signal fails to appear after 5-10 seconds after the integration time should have finished, release the fire laser button and restart spectrawiz.
Once the signal appears in spectrawiz, press the capture button while still holding the fire laser button. The capture button should change to this triangular "play" button once the signal has been captured.
We don't need to run the laser during data analysis. Slide the shutter so that the red dot is no longer visible. Turn the key to the off position (vertical). Remove the safety interlock and key. Unplug both the laser source and spectrometer and remove the USB connection between the computer and spectrometer. We won't be needing either for the rest of this tutorial. You won't need to shut everything down just to save your files but you should if you won't be using the equipment for a while (the laser source and spectrometer can get pretty warm after several hours). You can now remove the goggles.
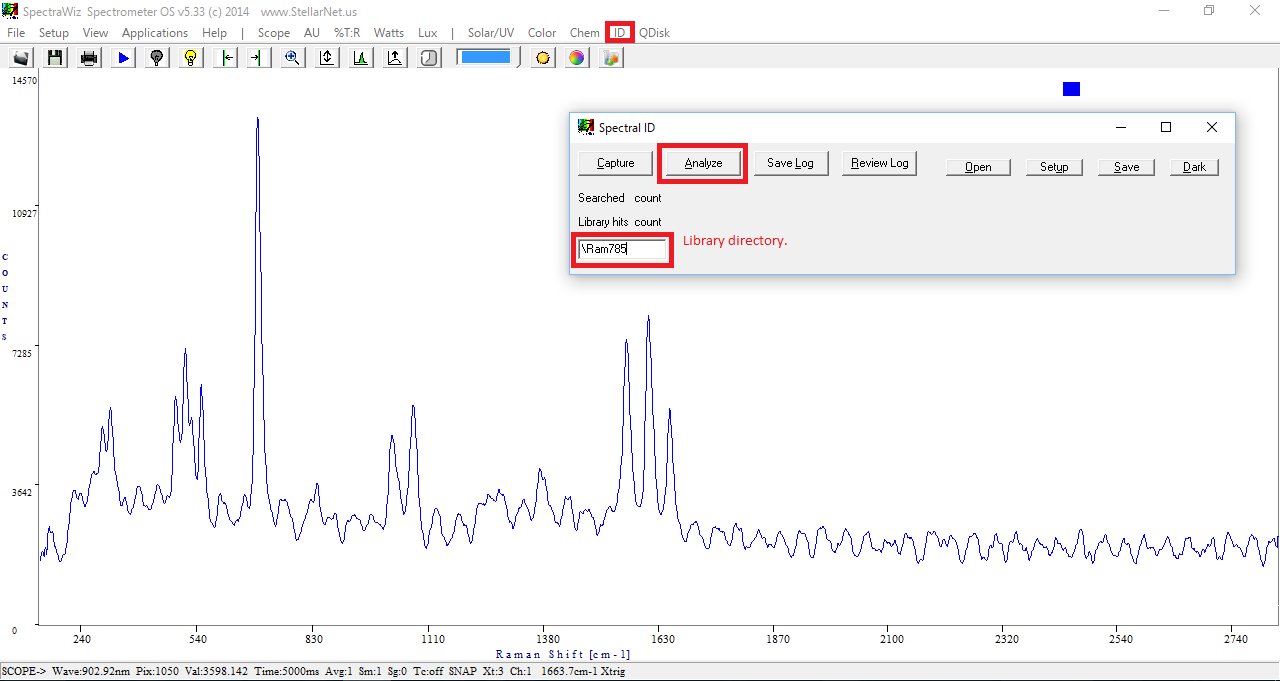
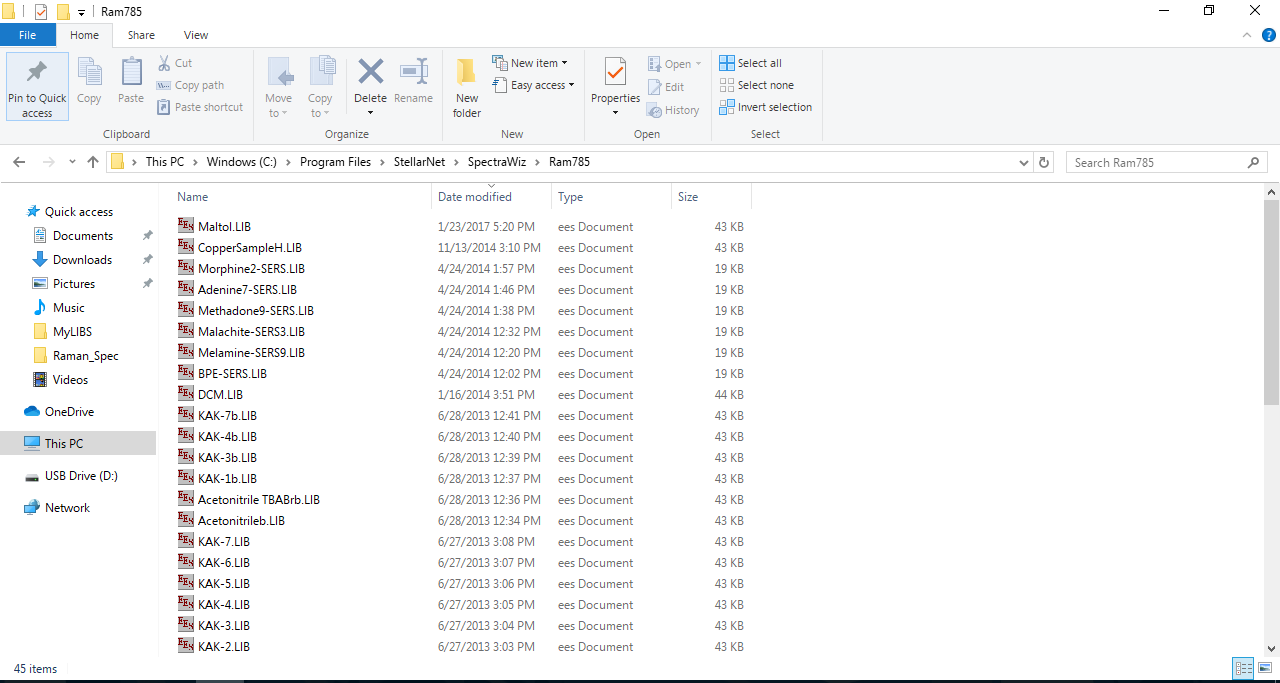
Now click the "ID" button at the top of spectrawiz. The "Spectral ID" window should appear. The library directory should be set to "\Ram785." Click the "Analyze" button.
The spectralID window should now show the signal's similarity to the stored maltol signal. The similarity should be around 78-80%. For right now, it's ok if your signal goes as low as 75%. Many factors can affect the signal's similarity. If you have run several trials in a row, the similarity is likely to drop. I'm currently unsure of the actual cause but it is likely due to the sample heating up. You may notice that this window has a "capture" button. You COULD use this window to run the spectrometer but the button will likely get "stuck" and you will have to restart spectrawiz.
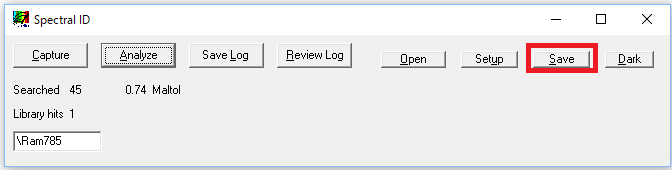
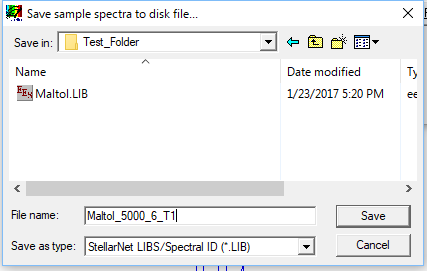
Now we will save that signal for later comparison. Press the "save" button in the spectralID window. Say yes to the "add to library" prompt. A file explorer windows should appear and allow you to save the signal. Add a new folder with a distinctive name. My folder is called "Test_Folder". Make sure that folder uses conventional characters and symbols.
We
will now move the provided Maltol signal into our new folder. Go to the
"Ram785" folder and copy the Maltol.lib file into your new folder.
Now
save your current signal in your new folder. Make sure its extension is .lib. I like to name my files as "SampleName_IntegrationTime_Power_TrialNumber". In the spectralID window, change the library directory to your newly created folder "\Test_Folder".

Press the Analyze button again. The window should now show "Searched 2" and "Library Hits 2". The Maltol signal should still show the same similarity. The signal you just saved should show a 0.99-1.0 similarity since they are the same signal. You can click the signals that show up as having similarities to overlay them over your current signal. If you click same signal twice, it will replace your current signal. If you hadn't already saved your current signal, it would now be gone forever. Thats why we waited to go over this feature until the current signal was saved. Make sure you click back to your current signal so we can move on to the next step. We will go back over this in future tutorials.
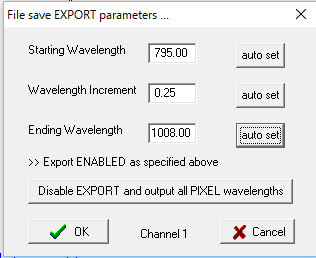
Now we will save this signal so we can later open it as a normal .txt file. Close the SpectralID window and say NO to the start data collection prompt. If you accidentally pressed ok, your signal will disappear and it will start collecting data again. If this happens, don't worry. We will soon go over how to open .lib files and save them in other formats. If you pressed NO, your signal should still be visible. Navigate to File and click Save > Sample. An export window will appear. Make sure everything is left in their default values and click OK.
A save window will appear. Save your signal in your new folder. Make sure its extension is .SSM. This file can now be interpreted as a normal .txt file. However, only the .LIB files will appear in file explorer if you navigate to your folder. I'm not sure why this happens. This is just one of several bugs you may/will encounter. We will soon go over how to move these files to a folder you can actually control.
We will now go over how to open .lib files and convert them to .SSM. I'm unsure of the draw back of this method but it can be helpful if you had to restart spectrawiz or if you forgot to save your signal.
Click File > Open and change the file extension to .LIB. Now select the library file you just saved. Spectrawiz will open the signal and display it on the screen. You can even run spectralID and compare it to other signals in the library. You can save this signal just like we saved the original one (as a .SSM). Although, this is unnecessary since we saved the original signal.
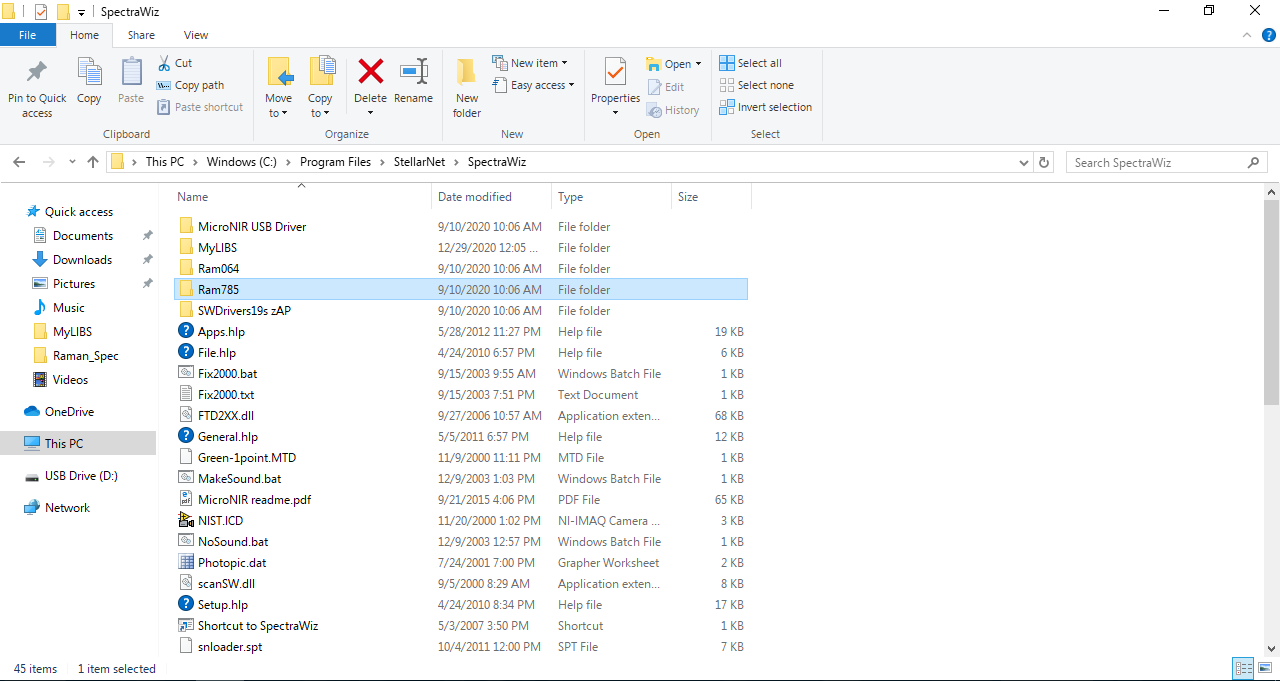
As I previously mentioned, you won't see the .SSM files if you navigate to this folder using file explorer. To actually see these files in programs other than spectrawiz, we have to move them to a folder we can actually control. The files we just saved might also be deleted from the program folder when you log back into this computer. We will want to make a copy of our libraries as well. Navigate to File > Open and single click your folder. Copy that folder and navigate to your personal drive or any of the other non-program related folder. Paste your folder there and verify that all of your files were copied. You should have the Maltol.lib file and both of the .lib and .SSM files you just created. If one or either of those files were not copied, make sure they are actually present in the folder you created in the spectrawiz folder. Normally you would want to move all of these files when you are finishing up your work on the spectrometer, just so you don't have to individually move each file every time you save one.
Congratulations! Thats the end of Tutorial 1. Your files should be where you left them, upon login. However, you may need to copy and paste your files back into the spectrawiz folder.
Raman Tutorials
or
Tutorial 2
Page Info:
Page created: December 28, 2020
Page Last Updated: January 5, 2021