Homework
7: UART
Noah
Smith
1.
In section 2. use the debounce module to create a counter. When the user press the button once, it shows a '1' on the seven segment
display. If the user keep pushing the button, the display increments by 1 until
9 then it resets to 0.(25 points)
To get the 7 segment display to count up every
time the user presses a button we needed 3 modules and a top module. A debounce
module, a logic or counter module and a decoder module. I included the code for
all these but the decoder module as it was the exact same as the decoder module
used previously. The flow for this project is simple User presses button >
button input is debounced > counter logic > decoder output. A video demonstration
of the working

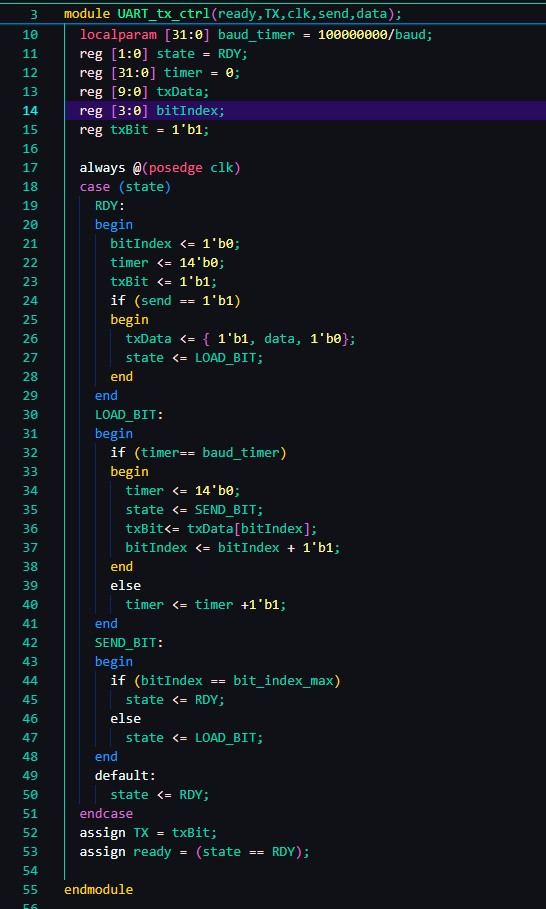
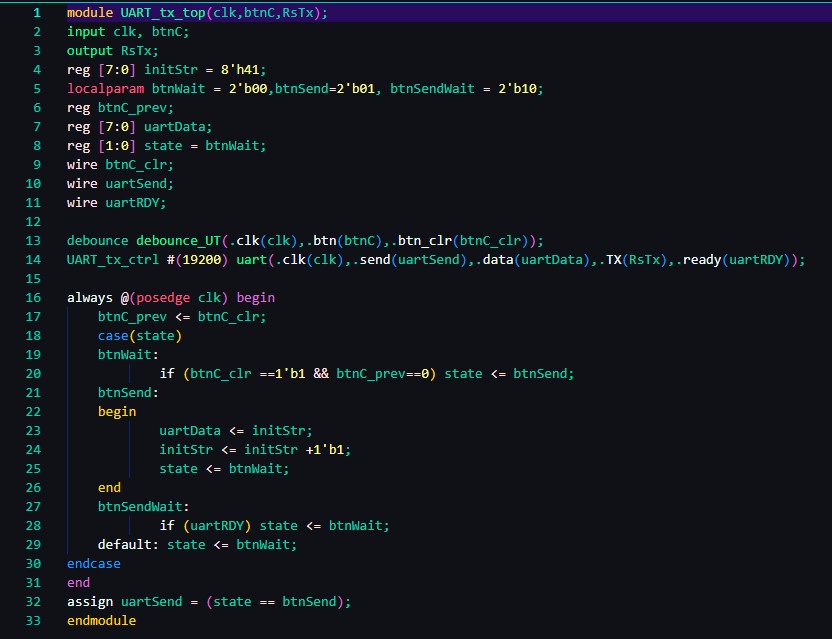
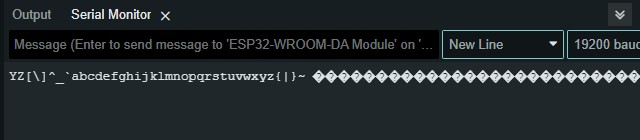
2. Repeat the UART transmitter in Section 2 to show letters/symbols in the
serial monitor. (25 points)
To display ASCII symbols in the serial monitor I used the UART
tx controller code from the tutorial. Following this
exactly lead to ASCII symbols showing up in the monitor.
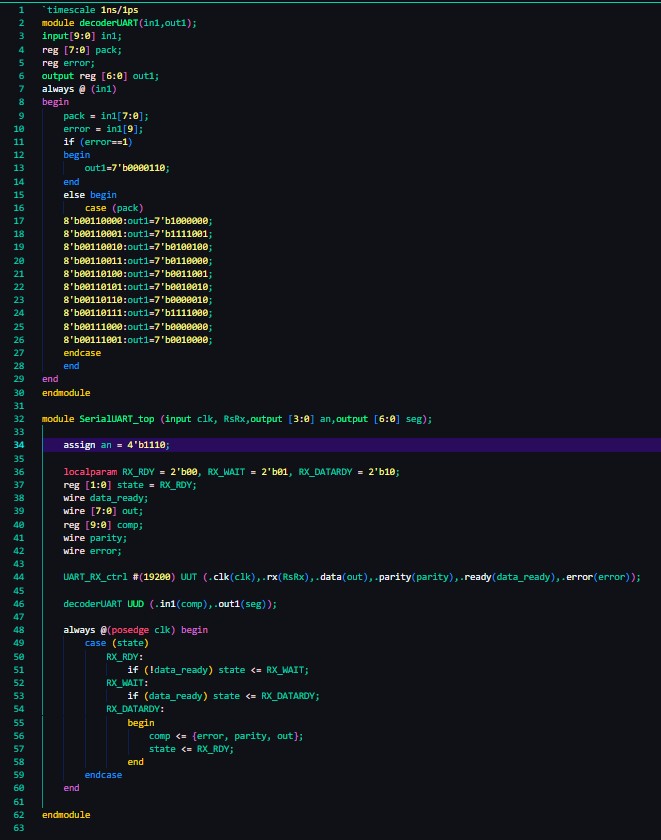
3. Repeat the work in Section 3. (25 points)
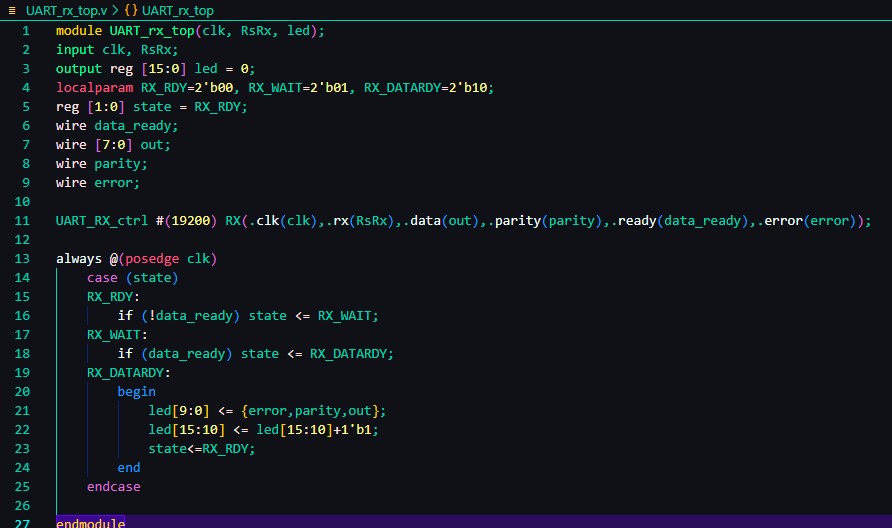
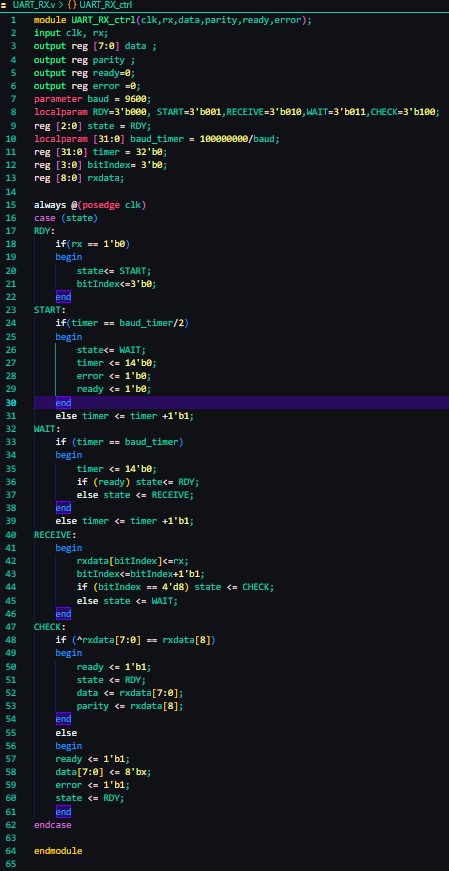
4. Show the numbers you typed in the serial monitor on one seven segment
display unit (less than 10). (25 points)
To show a number from the serial monitor on the 7 segment display we need a decoder and a UART RX module. I
changed the decoder to accept the full 10 bit UART
message and splice off the error and parity bits. A quick error check was added, if error is detected the display shows an “E”. Otherwise it proceeds to the case statement based off the 8
bit message. Video demonstration can be seen below. In
the video demonstration the display will show an “8” if multiple digits are
input at once. This can be seen when I accidentally double clicked the H
button.