The video linked below is a good introduction to gel electrophoresis.
Khan Academy: Gel ElectrophoresisTris
Acetic acid
EDTA
DI water
Gel rig
1X TAE Buffer
Agar (green lid)
Ladder
Gel red
Purple loading dye
PCR products
1. Measure 24.2g of Tris and add to a beaker.
2. Measure 5.7mL acetic acid and add to the beaker.
3. Measure 1.85g EDTA and add to the beaker.
4. Add 350mL DI water to the beaker.
5. Place a stir bar in the beaker and stir until the mixture is homogeneous. If the tris is not breaking down, turn on low heat.
6. Pour all the contents of the beaker into a 500mL graduated cylinder. Using DI water, bring the solution up to 500mL.
7. Pour this into an orange cap jar. Label the jar as “10X TAE Buffer”, include the date and your initials.
Creating the Gel
1. Gather materials and ensure you have sufficient 1X TAE Buffer.
2. Set up the gel rig using the stoppers and appropriate lane comb. Remember the gel must run to red!
3. Measure 0.5g agar into an Erlenmeyer flask.
4. Measure 50mL 1X TAE buffer into the flask.
5. Mix the agar and TAE by swirling the flask. Place the flask into a microwave and heat for 1 to 2 minutes, stopping every 30 seconds to swirl the mixture. Make sure it is not boiling over!
6. Remove the flask from the microwave when the mixture is completely homogenous.
7. Add 5uL of gel red to the flask and swirl the contents.
8. Cast the mixture into the gel plate and allow to solidify for 20-30 minutes.
Preparing PCR Samples
9. Transfer 6uL of PCR product into a new thermotube. Label the tube with a sufficient identifier.
10. Add 6uL of 6X purple loading dye to the thermotube. Pipette up and down the mix contents.
11. Store on ice until gel is set and experiment is ready.
Running the Electrophoresis Experiment
12. Remove the stoppers and lane comb. Insert the gel plate into the rig, making sure the wells are closer to the black terminal.
13. Using 1X TAE buffer, fill the rig until the gel is completely submerged, the liquid should be about 1cm above the gel.
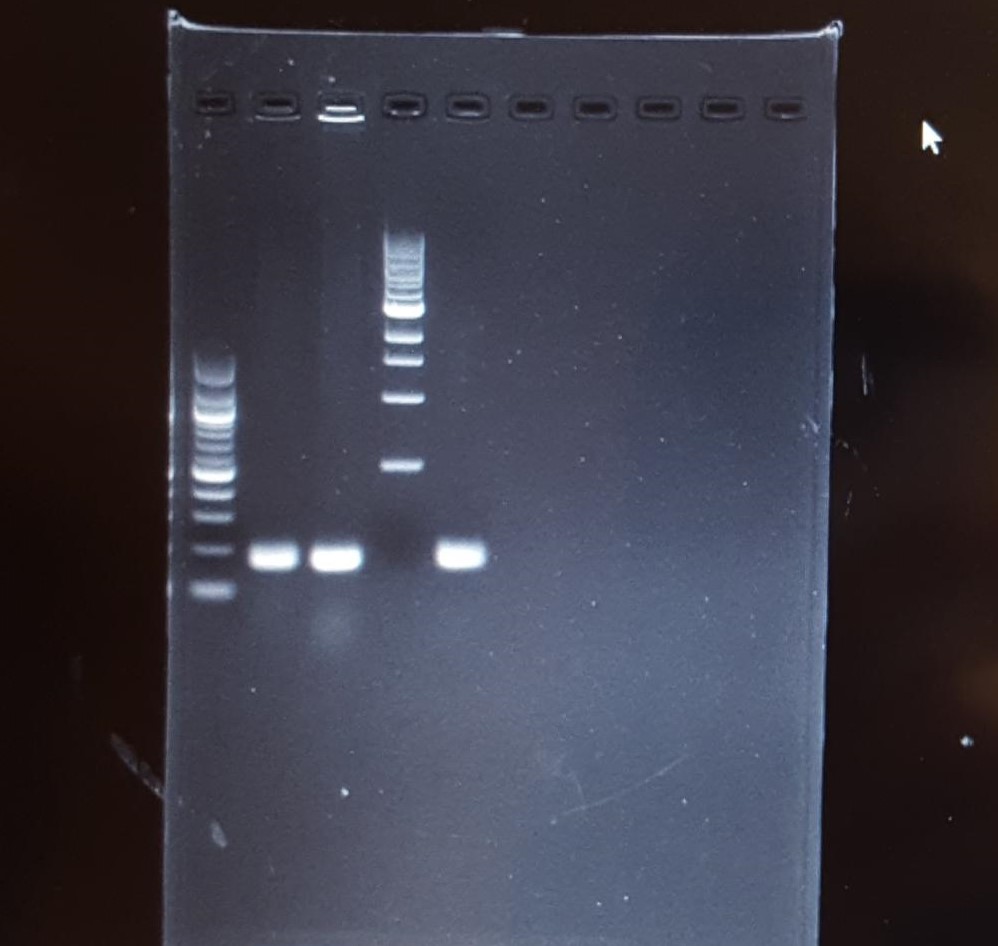
14. Add PCR product mixture and ladder. Make a diagram of the location of products in the wells.
15. Cover the tray with the lid and run until the dye front is 1/2 to 2/3 of the way down the gel.
16. After this is complete, turn off the machine and remove the lid. Allow to cool for a few minutes before removing the gel plate and gel.
17. Once removed, place the gel on the orange holder and dump the 1X TAE buffer down the sink drain.
Imaging the Gel
18. Place the gel inside the imager and turn on the UV lamp using the button on the back. Take a picture with your phone.
19. Throw the gel into the garbage can.
20. Label the image with the contents, assay, and date.