Humberto Arredondo
Perez
CE 351 - Fall 2020 harredondoperez@fortlewis.edu
Introduction
In this class we developed an IoT Temperature Monitor to get real
temperature from our location to a website. To achive this goal, we
used and followed a tutorial provided by Dr. Li. We used 2 arduinos
nano, a wifi module, a sensor for temperature and a display to see the
temperature in real time.
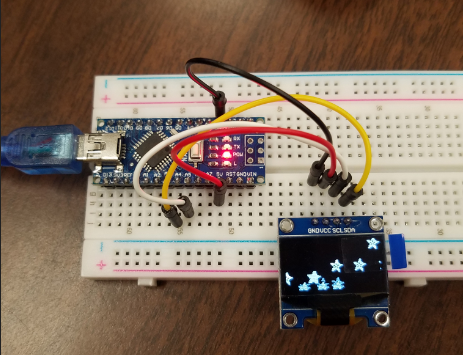
Methods and Materials First, we
paired up the ssd1306 OLED module to the arduino nano and display some
graphs made by Adafruit in Figure 1.
Figure 1. Oled
module graphics display.
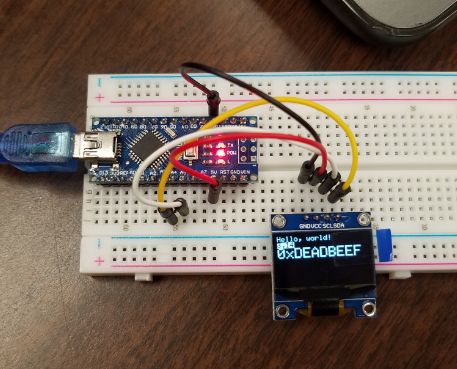
Then, we change the code to only display text because we did not need
graphics for this application (Figure 2).
Figure 2. OLED showing only text.
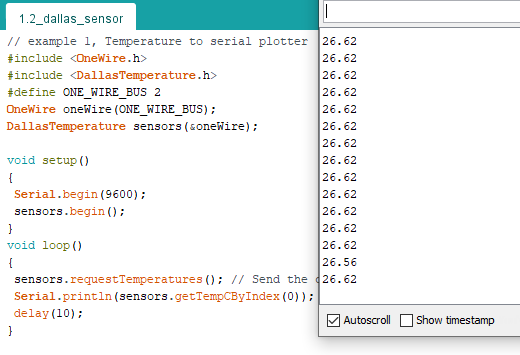
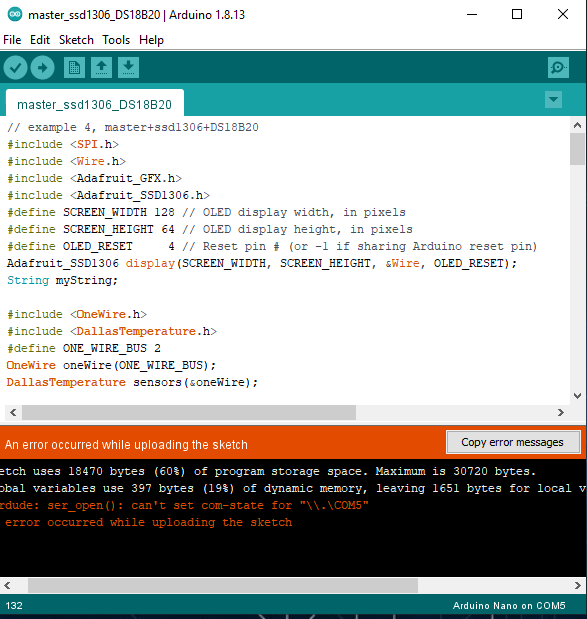
After getting the code with only text, we connect to the arduino nano a
sensor to keep track of the temperature. We used the Dallas DS1820
which is a high quatity sensor. Then, we run the code and checked for
the temperature display in Figure3.
Figure 3. Code to paired up the Dallas sensor and displaying
temperature values.
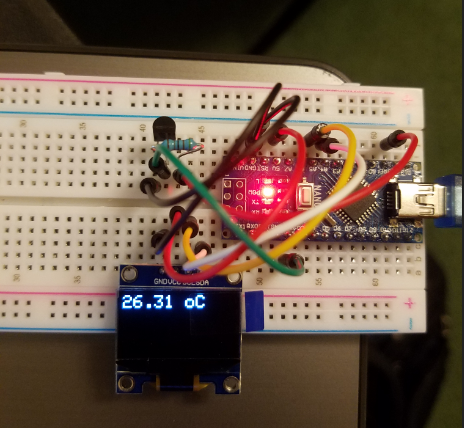
After learning how to connected the Dallas sensor and the OLED module,
we connected them together so we can see the temperature in the display
instead of the serial monitor, which is more practical. The result is
showing in Figure 4.
Figure 4. The temperature value is obtained but the DS1820 and sent to
328p microcontroller in arduino, then send it to the ssd1306 Display
module.
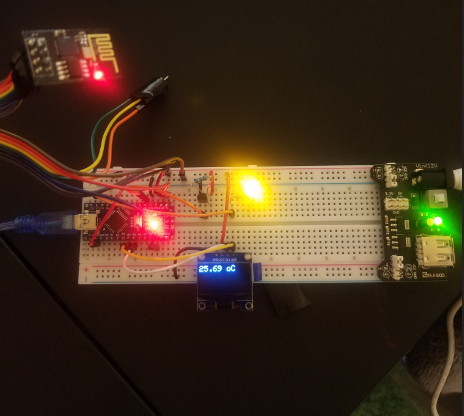
Now, using an example of ISR while the temperature is being display was
the next task to do. We code in arduino and while the temperature were
been display in the OLED, we started to blink a LED every 40 seconds.
the result is shown in Figure 5.
Fugure 5. Blinking an LED while displaying temperature and using 1 wire
communication.
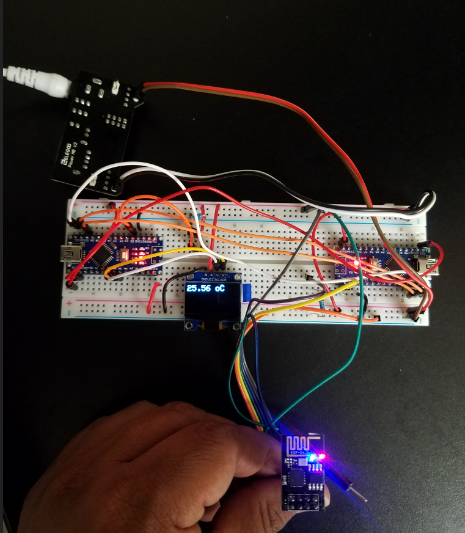
Once we had temperature been displayed, we add the ESP8266 wifi module
to send the data to a website on line called ThingSpeak to have it
display in real time there, so we can check the temperature remotly
(see Figure 6).
Figure 6. Code, circuit in
the bread board and the display results in ThingSpeak.
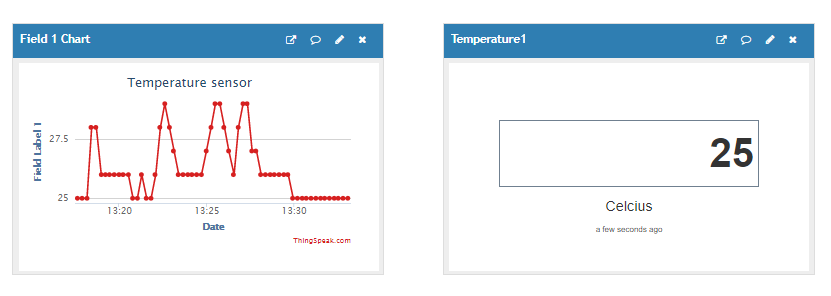
Fugure 7. Temperature monitor in ThingsSpeak.
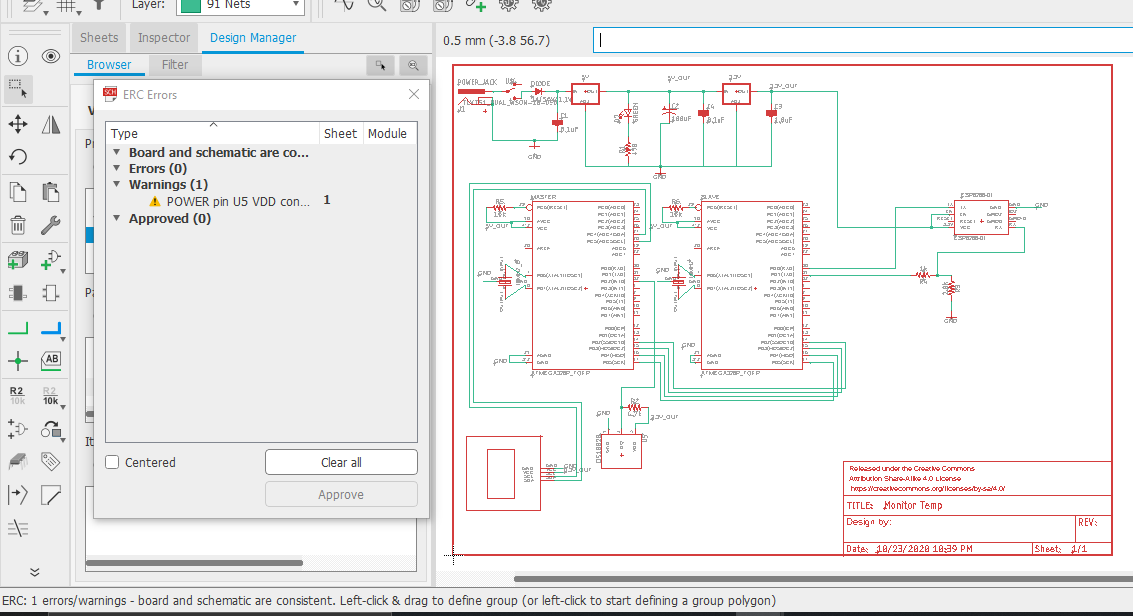
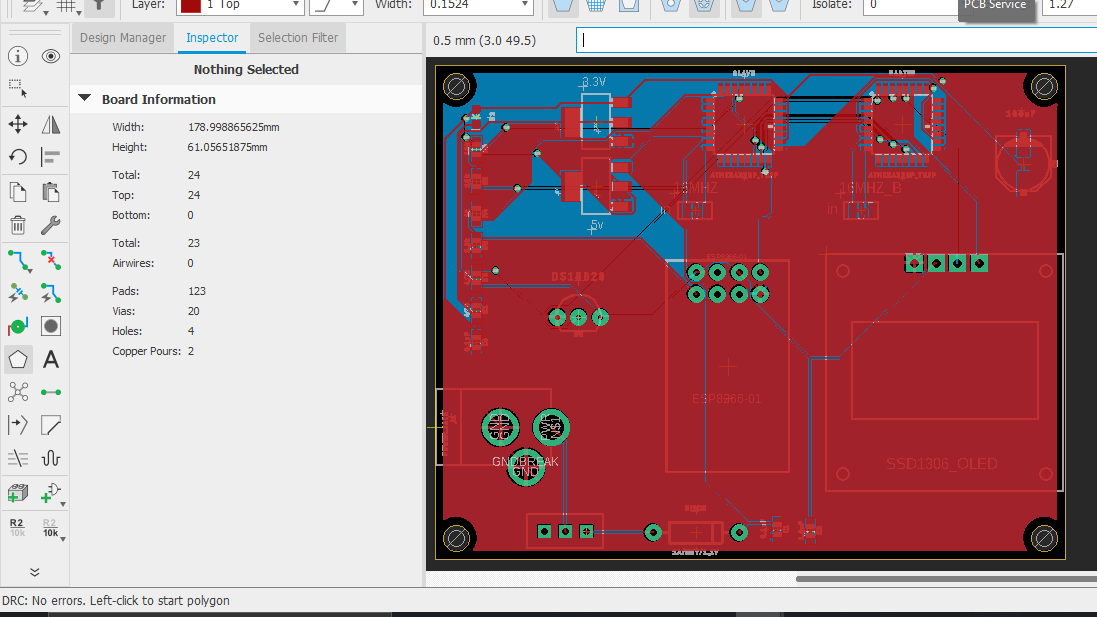
Figure 8. ERC is showing no errors.
DRC in the layout showing no errors.
Discussion
In this project we learned how to build a temperature monitor using
some well known components such as Arduino nano, OLED module, WIFI
module ssd1306, ESP8266 and how to used SPI communication protocol
(using 1 wire). we also explore on the usage of a master and a slave
for the arduino nanos. Overall, it was a really fun proyect to take a
used of all this new components that are out there in the market at low
cost.