Home
Work 4 - Advanced MCUs, Boards, and IDEs - MSP430 and ST32
1. Introduction
Broadening our horizons with different
microcontroller units (MCUs) that are used in the industry is important
in ensuring that we can become versatile engineers. For this project,
the Energia IDE was explored while learning how to navigate the
MSP430GE2T with Launchpad by Texas Instruments (TI). We also explored
the ST32 on a NUCLEO F401RE with the STM32Cube IDE. With the ST32, we
also delved into C programming which is different than the C++
programming that we have done in the past.
2. Materials
Breadboard
Wires for connecting
LED (DIP)
10k Potentiometer
MSP430GE2T with Launchpad
ST32 with NUCLEO F401RE
Energia IDE
STM32Cube IDE
3. Procedure
For this section of the report, MSP430GE2T with
Launchpad will be abbreviated as "MSP430" and ST32 on a NUCLEO F401RE
will be abbreviated as "ST32".
We started by learning how to use the
Energia IDE and the MSP430. We did this by uploading a
simple sketch to blink the green and red LEDs provided on the
Launchpad.
A demonstration video can be seen below:
I noticed that the variable names in the code did not match the color
of the LEDs on the board, so my first thought was to check for
continuity to ensure it was assembled to the schematic.
A demonstration video can be seen below:
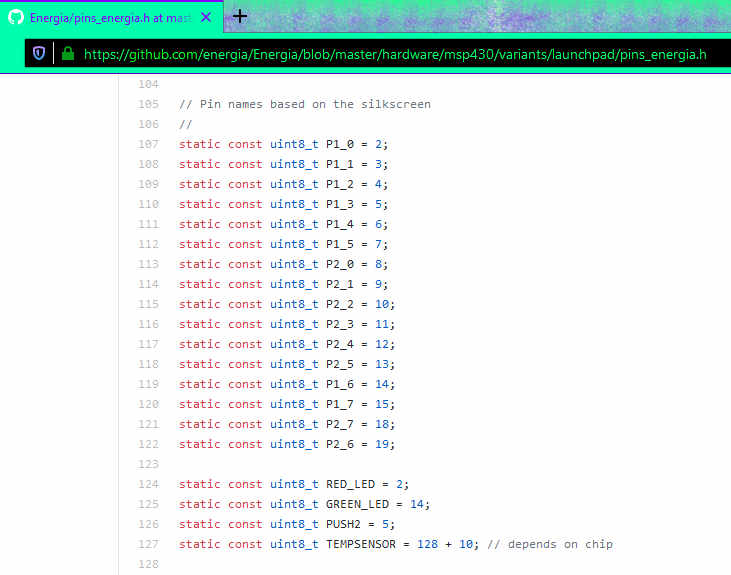
There was nothing wrong with the board, so I checked the source code
for the external library that was being used. It turned out to be a
mislabeling in the library's code.
Here is a snippet of the code in question:
As you can see, the pins are just labeled with the wrong color of LED
of this board in particular.
Next, we rotated the jumpers of the RX and TX pins to short them
together to access the serial monitor. I had to make sure I was using
the proper port on my computer to not interfere with the UART
communication.
A simple code was uploaded to test whether the data was being recieved
and displayed in the serial monitor. A demonstration video can be seen
below:
Next, we took an analog reading to control the frequency of a blinking
red LED. A green LED also dims and brightens along with the voltage
output of the potentiometer.
On the left are the minimum possible values, and on the right are the
highest possible values.
Next, we explored serial communication through Bluetooth. A LED and the HC-05 was
wired to the MSP430, and a Bluetooth serial monitor app was downloaded
onto my cell phone.
The serial monitor app was used to send text messages to the MSP430;
the MSP430 controlled the LED based on the data being recieved from the
serial monitor. A 'H' indicated voltage high, and a 'L' indicated
voltage low.
Then I downloaded the Arduino Voice Control app, and we hooked that up
to the LED and HC-05 to control it by speech.
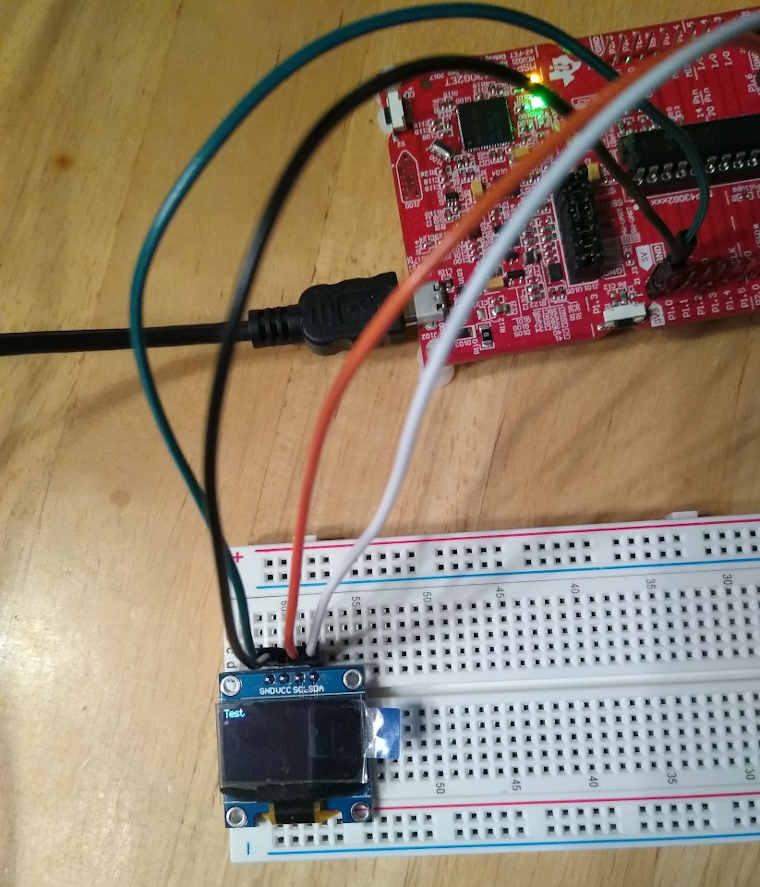
We then removed all connections and connected an OLED to the MSP430. We
then turned it on and tested it with a test sketch provided by Dr. Li.
We only need to display text; The string "test" was displayed as a test.
Next, we connected the HC-05 to the OLED and MSP430. The speech-to-text
translation was displayed on the OLED as shown in the video above.
After the MSP430 projects were completed, it was time to dive into the
ST32 and the STM32Cube IDE. After reading up on C programming, we began
learning how to use the IDE with a simple blinking sketch.
Like the previous LED blinking sketch we did, we also used a LED that
is provided on this particular board.
Then we explored UART with the ST32, and we sent a string message to a
serial monitor. For this, I believe I used the Energia serial monitor
as shown below:
Next, we echoed data recieved over UART.
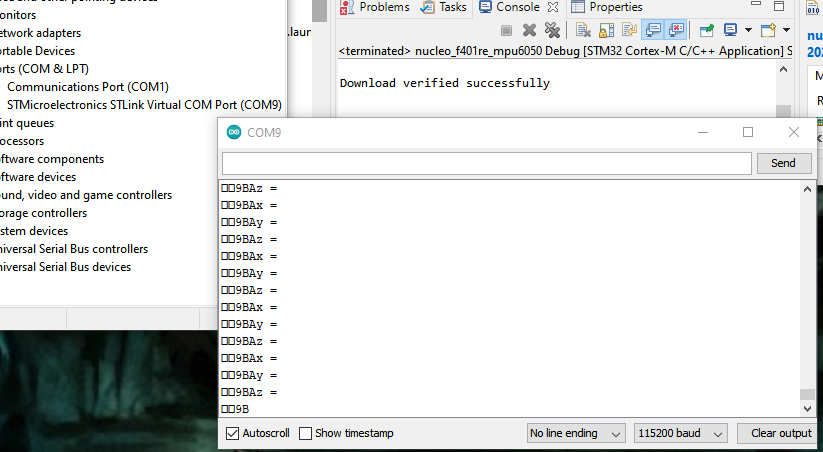
Finally, we hooked up an accelerometer to the ST32 and read the data to the serial monitor!
2. Discussion While reading data from the accelerometer with the ST32, I kept
getting strange values. I tried multiple ways to ensure that the code
was as it was supposed to be. I could not find where the issue lies,
but in the future, I will go over this more detailed to make sure everything works
correctly.
Overall, this project was very enriching. It really broadened my
knowledge and experience with other MCUs that are not associated with
Arduino. This project also broadened my knowledge and experience with
IDEs other than the Arduino IDE. Working with C language instead of C++
was also new and very valuable to me for the future!