CE351 2023 Spring
Build an IoT temperature monitor
Name: Vann Montoya Email:
bvmontoya@fortlewis.edu
Build an IoT temperature monitor
Introduction
The purpose of this assignment is to create a wireless temperature
sensor via WIFI.
We will be achieve this by using an Adruino nano, Dallas DS1820
temperature sensor, OLED display, and an ESP8266 WIFI module.
Materials and
Methods Adruino Nano
Dallas DS1820 temperature sensor
OLED display
ESP8266 WIFI module.
Results Task
1.1:Repeat
this example on your side.(5 points)
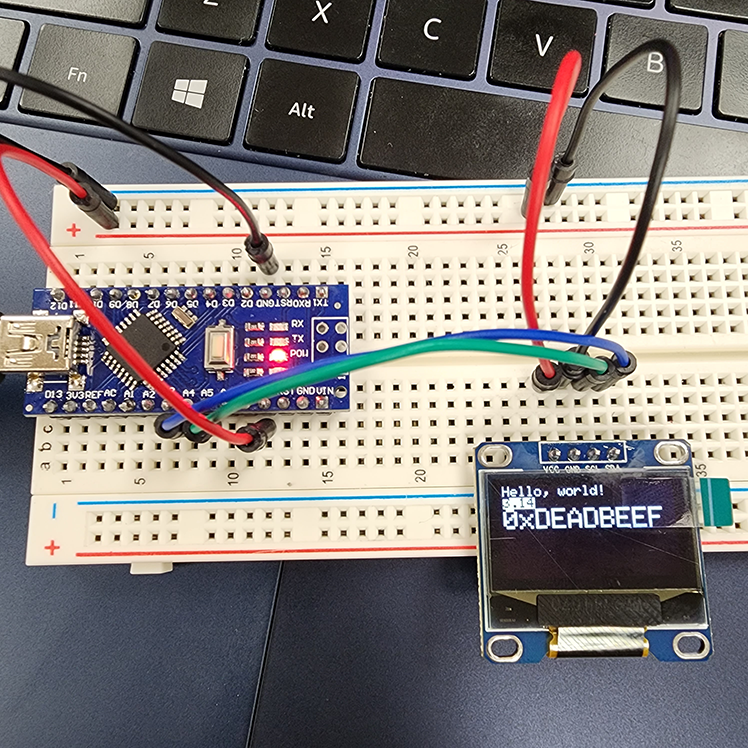
In this case we want to use Adafruit OLED library
but without all the extra animations, images and texts, so we want to
modify the code to simplify it.
Figure 1: The OLED connected with the Arduino showing a
simple display.
Task
1.2:Repeat
this example on your side.(5 points)
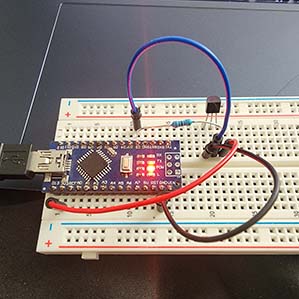
Now we want to connect our temperature sensor to the
Arudino and read from it using the Serial Monitor.
Figure 2: Arduino wired to the Dallas DS1820 temperature
sensor.
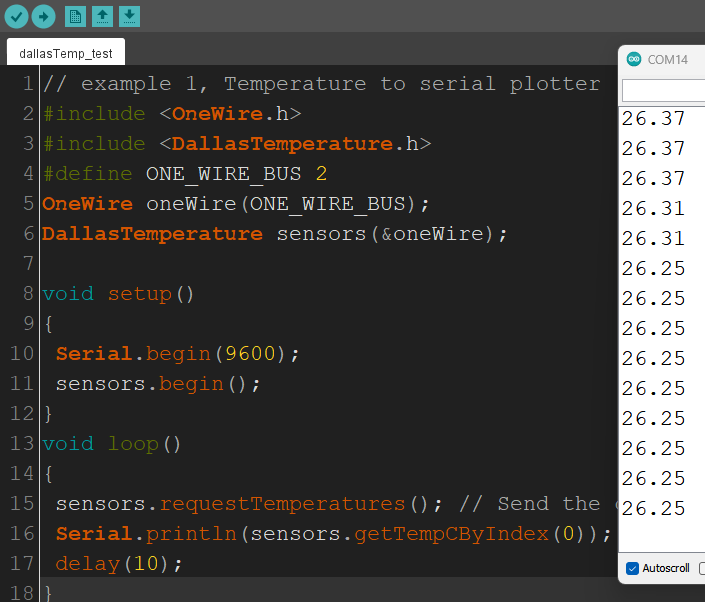
Here's the code used to read from the sensor and display to the Serial
monitor:
Figure 3: Dallas DS1820 temperature sensor code and
Serial monitor readings.
Task
1.3:Repeat
this example on your side.(5 points)
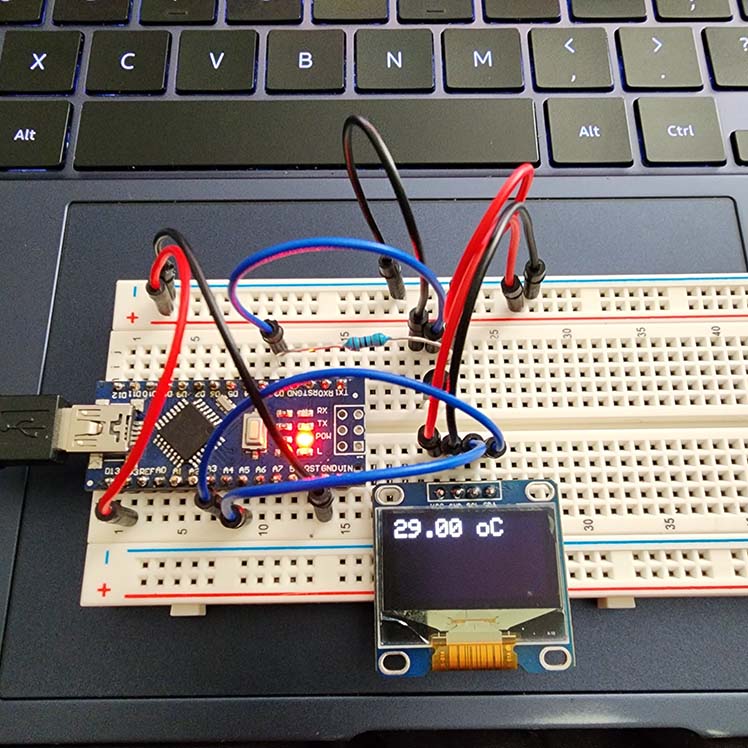
For this section, we want to combine both previous
steps and read from the temperature sensor and display it to the OLED
display.
Figure 4: Arduino displaying the temperature to the OLED.
Task
2:Repeat
this example on your side.(15 points)
Use an ISR while displaying on ssd1306
Video 1: Demonstrating the
OLED still displaying when an interrupt
Task
3:Repeat
this example on your side.(50 points)
Now we want to take readings from the temperature
sensor and transmit the data via WIFI.
However, there is an interrupt conflict between the
OLED and the WIFI module, we will need two Ardunios, one to handle the
temperature readings and displaying and the other to transmit the data
via WIFI module.
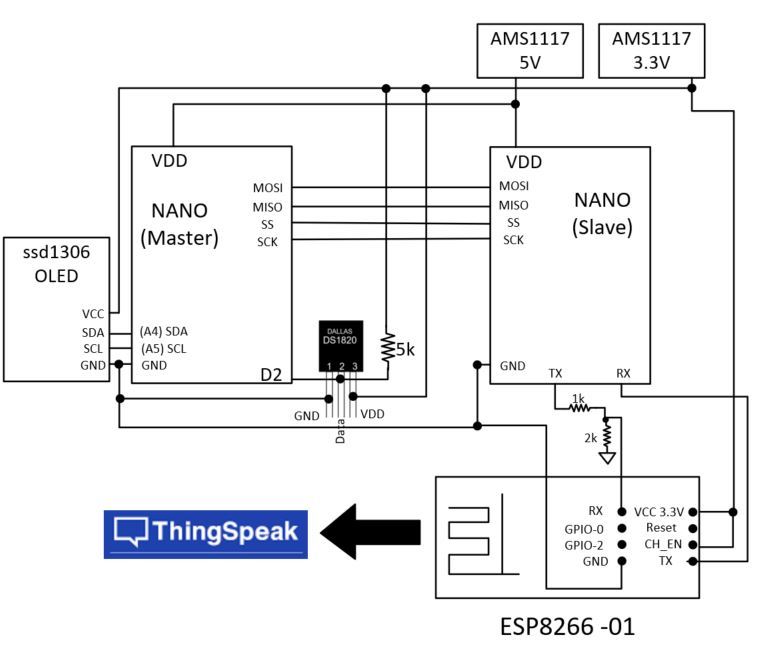
Figure 5: Wiring diagram for the system.
Video 2: Demonstrating the system working and
communicating with ThingSpeak.
Task
4:Add a pushbutton or a few pushbuttons to
the system to allow the user to change the WiFi AP username and
password.(10 points)
For this task, I focused only the password input so
I removed all the additional components and only had the Arduino and a
rotary encoder for input and displayed to the Serial Monitor.
I've coded the rotary encoder to cycle through
upper/lower-case letters and 0-9 then a "DONE" for when the inputs have
been selected.
Video 3: Demonstrating password input using a rotary encoder.
Task
5: Design the schematic
and the PCB layout of the system in Eagle.(10 points)