Tutorial 2
- Take Photos (Module 2 and 3 in Rui's textbook)
1. Take
some photos by itself (Module 2 Unit 1) (10 points)
The first example is to let
the camera take photos by itself. The sketch I used in this example was
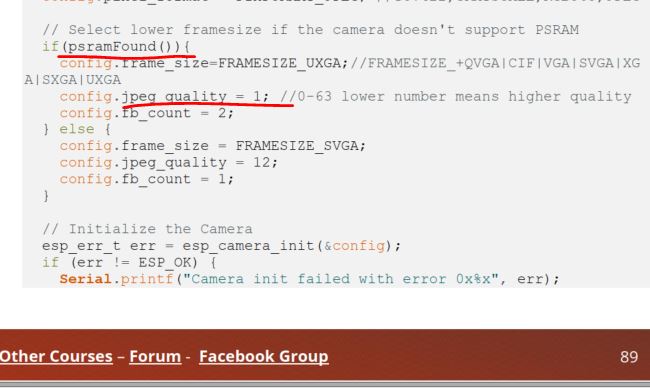
copied from Page 88 - Page 90 from the textbook by Rui. In the sketch,
There is an 'If' statement to configure the image quality. Since our
ESP board has a PSRAM, the first entry of the 'If' statement will be
used and the default quality is '1' which is too high. This setting may
cause problems to your images. I changed it to 40 in the following
sketch to ensure that the images will be visible after the shots.
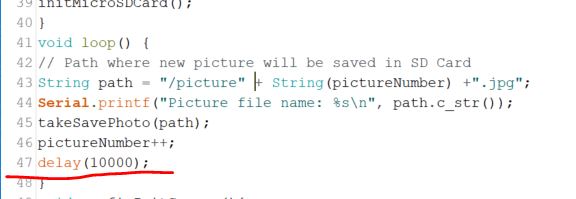
You can change the delay time to change the intervals between the shots.
Use the code in this link for your ESP32-CAM.
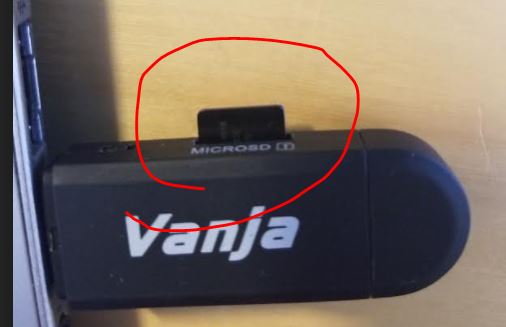
Load the microSD card to the
ESP32-CAM board. Let the camera take 5 shots (you can tell from the
flash light) and then load SD cards to the adapter to see the images on
the card.
The first image - Picuture0
always show some weird color. We'll try to figure out this issue later.
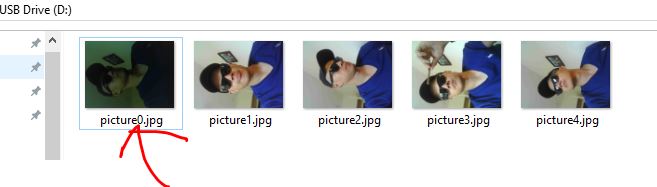
Please note that every time you reset the ESP32-CAM, it overwrites the previous photos.
2. Customize photo names (Module 2 Unit 2) (10 points)
The majority of the code from Page 104 - Page 107 have no issues.
The NTP server sends the GMT time by default. In August, there is a 6
hours lag in Colorado compare to GMT. Here is how I modified the time
calculation.

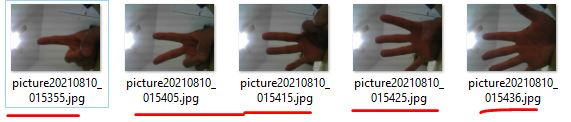
The following snippet shows the photos named with the dates and time are saved on the SD Card.
3. Take photos with a pushbutton (Module 2 Unit 4) (10 points)
There are not many GPIO pins available for external connections. Most
of the pins have been occupied by either the camera or the SD card
adapter.
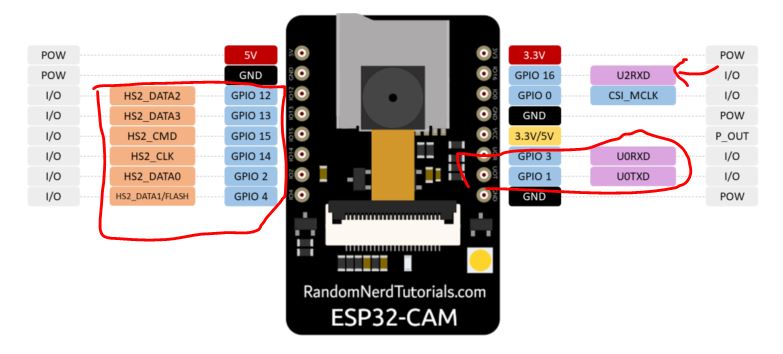
(picture from Rui's textbook)
As described in the textbook, GPIO 16 is the best option to control a pushbutton. (Page 119 of the textbook)
When a push button is involved, a software debouncing is required.
First, assign the GPIO that controls the pushbutton and give initial states to the state variables.
Make the following hardware connections:
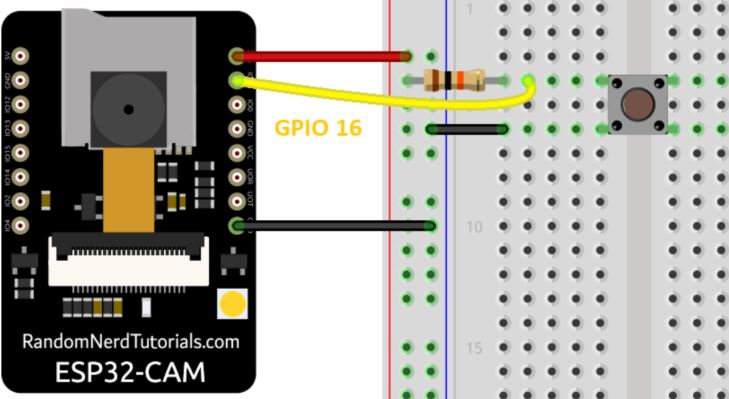
(picture from Rui's textbook)
In the sketch provided in the textbook, the code related to the debouncing follows:

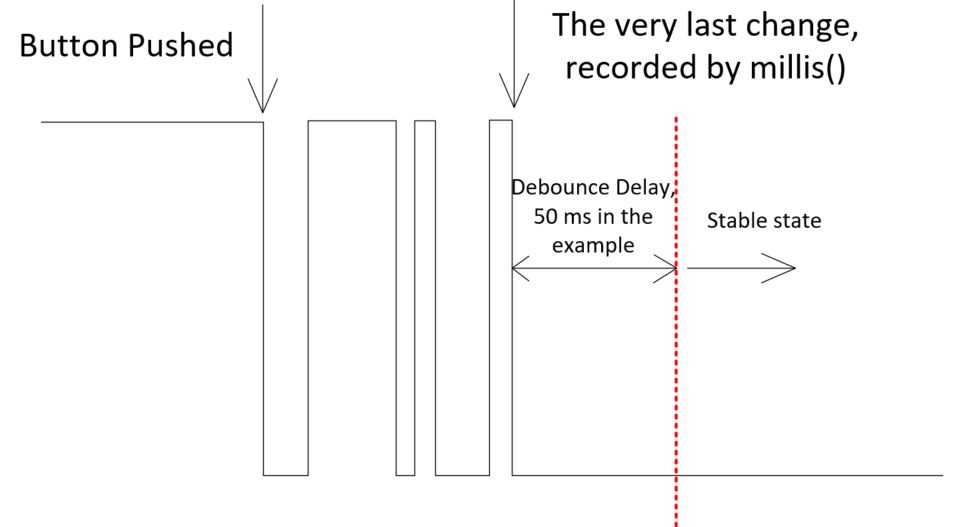
The 'last state' and 'current state' can be used to detect the button
pushing activity. The following is the debouncing software. It skips
the 'if' statement from line 338 to line 351 until the very last change
happens and then waits for 50 ms (variable 'debounceDelay') to execute
it.
Variable buttonState was initially set to HIGH. If it is the first time
to be pushed, the stablized Voltage Low after the 50 ms delay is LOW.
According to line 340, 'reading' is not equal to 'buttonState' and the
contents inside the 'if' statement will be executed.
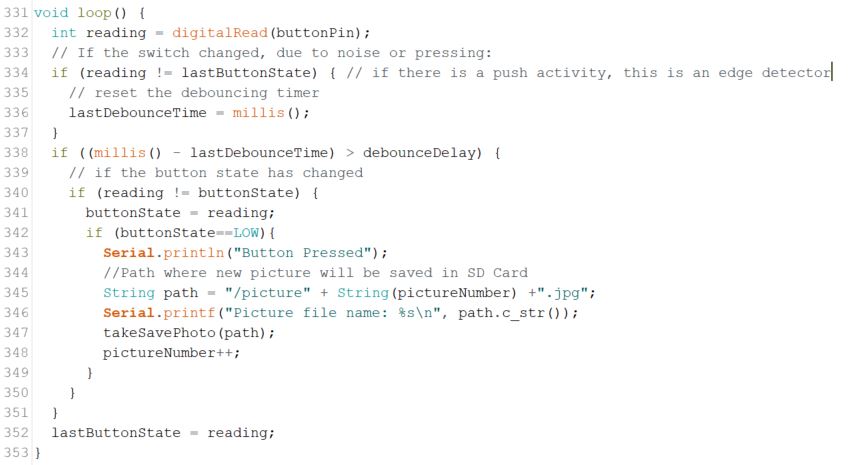
(screenshot of a script from Rui's textbook)
The following diagram explains the operation of the debounce software.
Upload the sketch to the ESP and take 5 photos using the pushbutton.
4. Use a webserver to take pictures (Unit 5: Take photo and Display in Web Server) (10 points)
Follow the instructions on Page 131 to install the
ESPAsyncWebServer library and the AsyncTCP library. Directly use the
code on Page 133 would work on your ESP. Don't forget to change the
photo quality to 40.
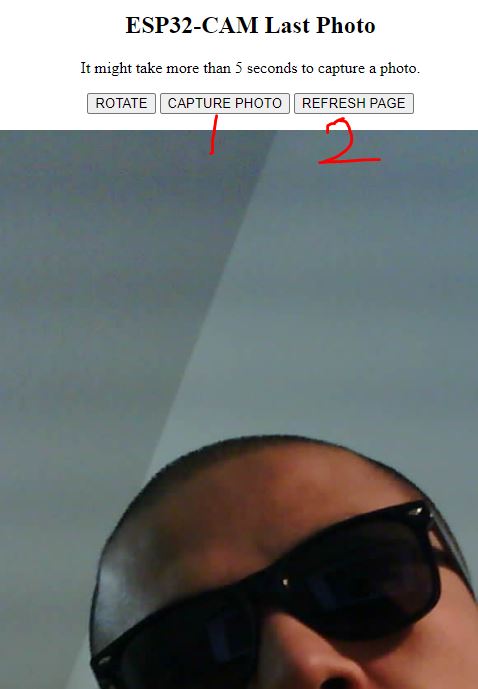
Open your browser and capture a photo followed by 'refresh the page' to display it the browser.
5. Web Server SD Card Photo Manager: Capture, View, and Delete (Unit 6 in the textbook) (10 points)
Use the sketch on Page 149, change the WiFi credentials.
Open the browser, refresh the page, you should see a photo shown in the browser.
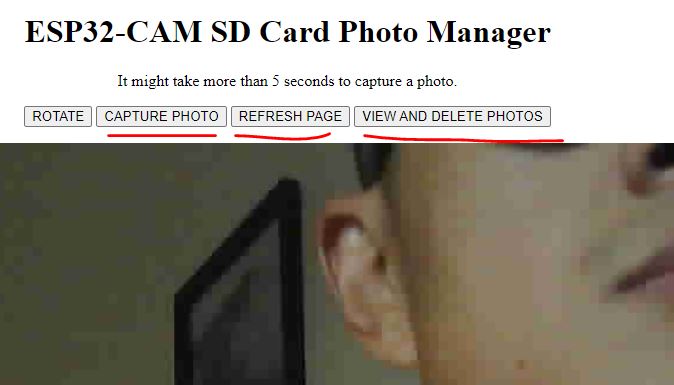
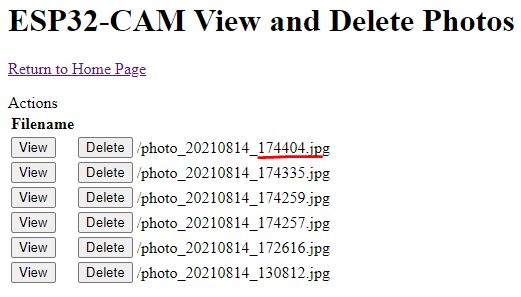
Click the button 'View and Delete Photos' you will see a list of photos.
The time must match the time on your computer. Refer to earlier
sections in this tutorial regarding setting the time for the photos.

6. Take photos and send notifications (Module 3 Unit 1) (10 points)
Follow instructions on Page 172 to install the ESP32 Mail Client library.
- Add the ESP32 Mail Client library
- Change the Google security configuration (if you use Google).
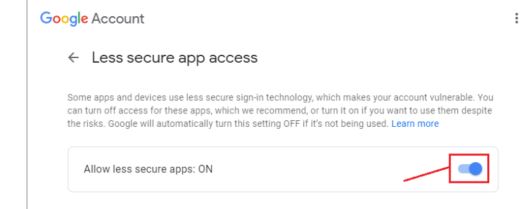
- If you use GMail as the sender, the example from the book works for you.
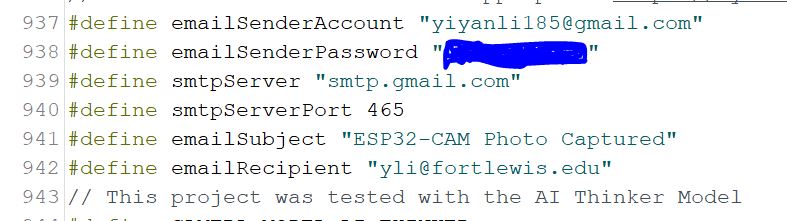
- Add the sender email account and recipient email address to the top
of the sketch. (Rcommended by the textbook, do not use your main
peronal email address as the sender, register a new one. It can be
banned by Google if some the program goes wrong).
Once the sketch is uploaded, restart ESP and check your email inbox.
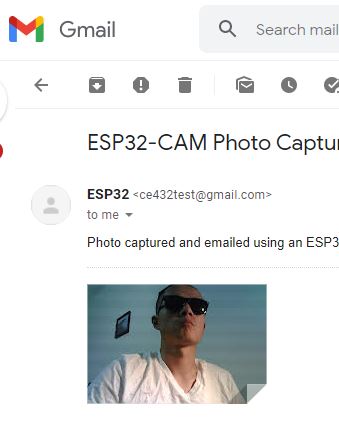
7. Take photo and email photo with a web server (Module 3 Unti 3) (10 points)
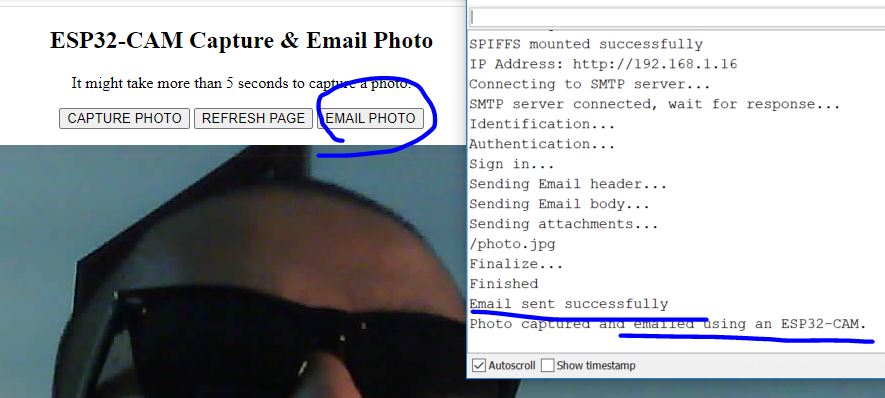
In this example, the browser will be able to capture a photo, display
the photo, and email the photo through the browser. In the meantime,
there is the box to allow the user to modify the recipient directly in
the browser.
The sketch from Page 205 - 212 works for the ESP. Make sure you change
the WiFi credential, the sender email and the recipient. Please show
the logs in the serial monitor in your report.
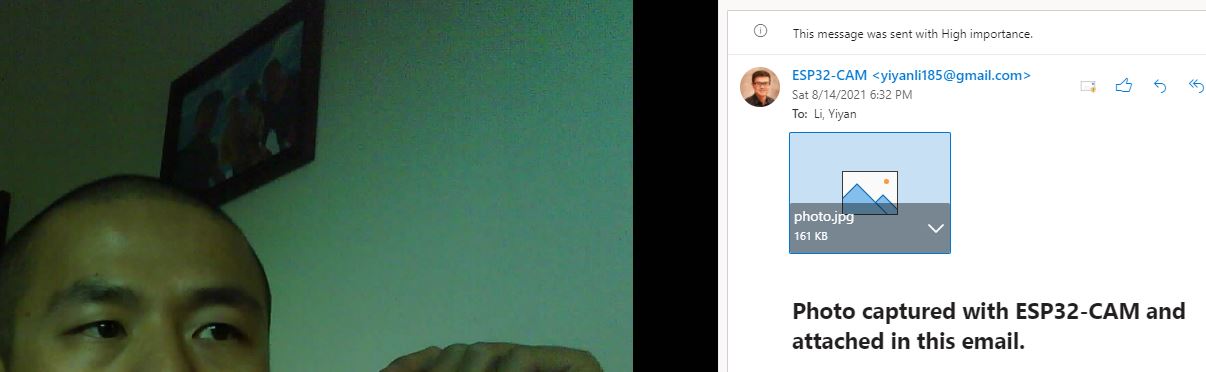
Here is my recipient email inbox and I can see the photo send by the sender email.
8. Take and Sennd Photo to Telegram App (Module 3 Unit 4) (10 points)
In this section, we will use an APP to send messages to the ESP. The
messaage can toggle the flash light and take photos. This is a good
example for home automation projects. This example will be very useful
since you can use your phone at anywhere has a WiFi connection in the
world to take a photo of your home.
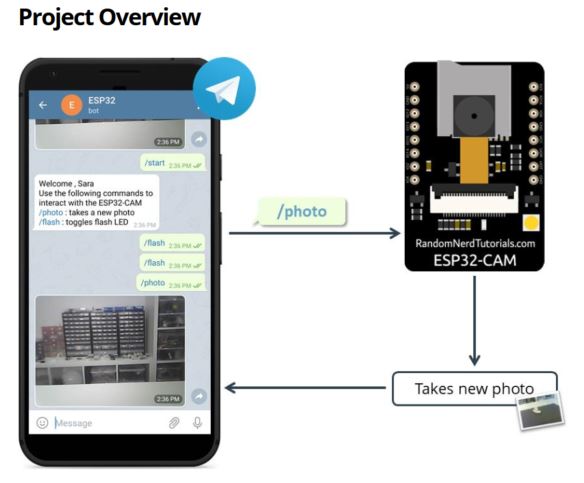
(A figure from Rui's textbook)
Follow the instructions in the textbook from Page 221 - the end of the unit.
- Install Telegram App to your phone
- Search for 'botfather' and start it.
- Create a new bot by messaging '/newbot'
- Search for IDBot' to be ready for following steps
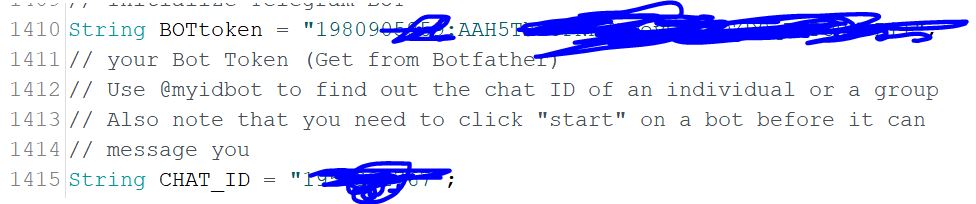
- Copy/paste the code in the textbook to your IDE, change the WiFi
credentials, the bot token, and the chat ID (found from IDBot) in the
code.
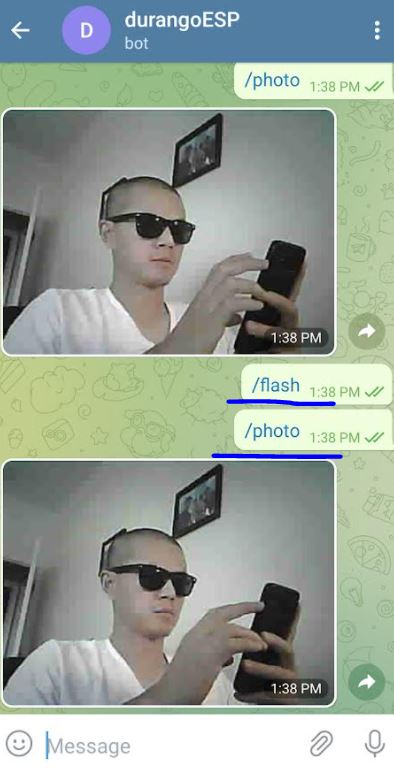
Potential issues and the solutions:
- Diretly copy the code from the book didn't work for me. I went to the gitbub link and used that code and it worked.
- The original photo quality setting didn't work for me. I changed '10' to '40' and it worked.

- Turn on or off the flash of the ESP doen'st make much difference if your room is illuminated well.
----------------------------------------------------
Task 1 - 8: 10 points each
Report writing and submission, 20 points