Tutorial 1 - Get Started
Follow the textbook - ESP32-CAM Projects by Rui Santos. This textbook is required for course CE432 Robotics II. Availble for purchase from here: https://randomnerdtutorials.com/esp32-cam-projects-ebook/
Pinout of the board:
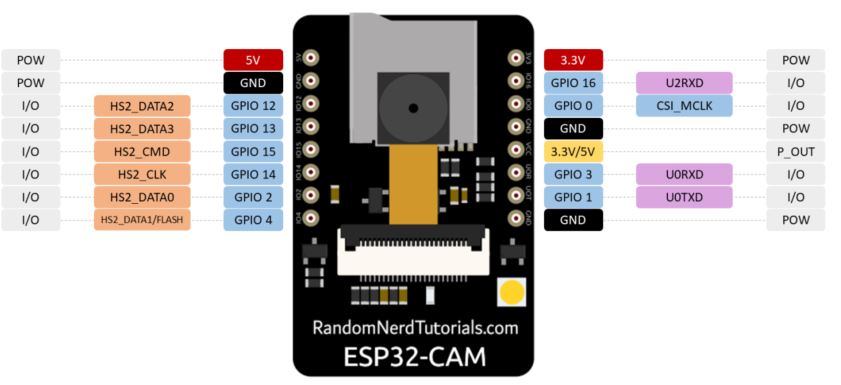
(A figure from the textbook ESP32-CAM Projects by Rui Santos)
Setup the IDE:
Read Page 39 - Page 42 on the textbook to set up your IDE. Some other tricks that may help:
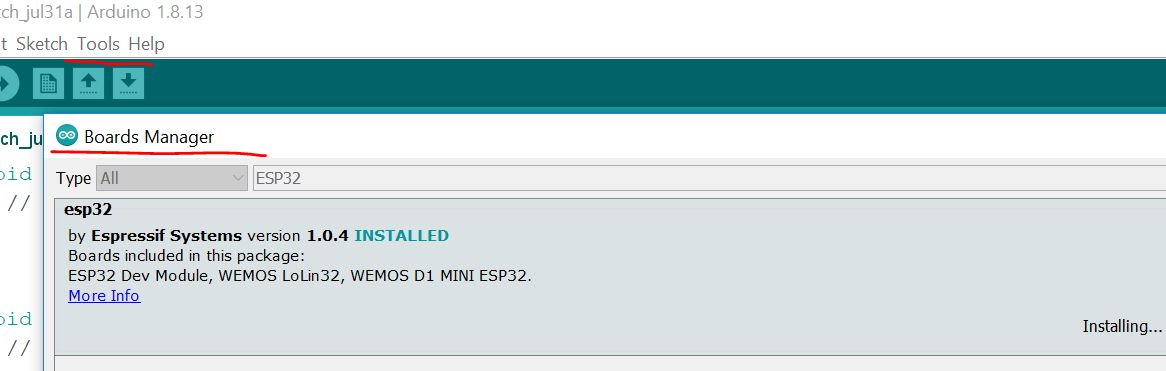
If you have installed the old version of the ESP32 module, please update it to the newest version to show the ESP32-CAM board.
The old version doesn't have the ESP32-CAM board:
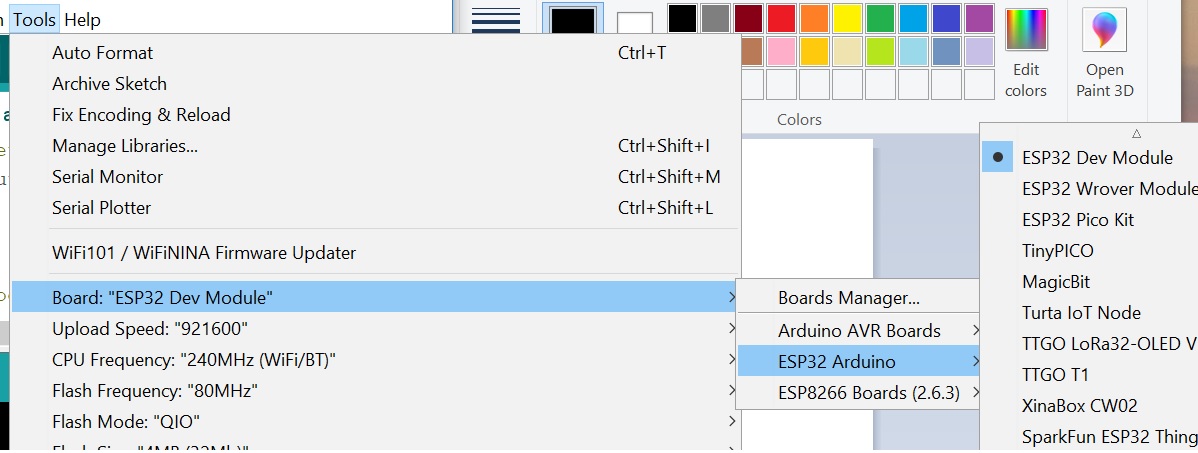
In Board Manager, search for ESP32 and then update it.
Pick up the 'AL Thinker ESP32-CAM' boad:

Make hardware connections:
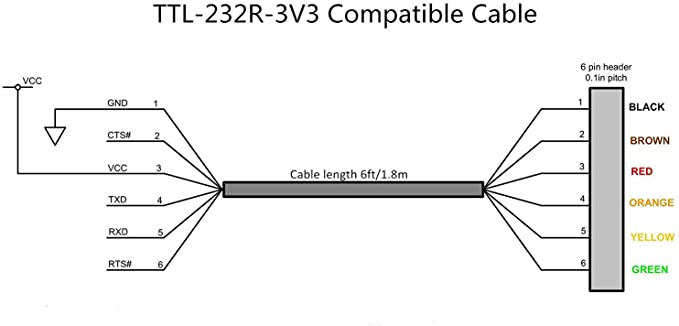
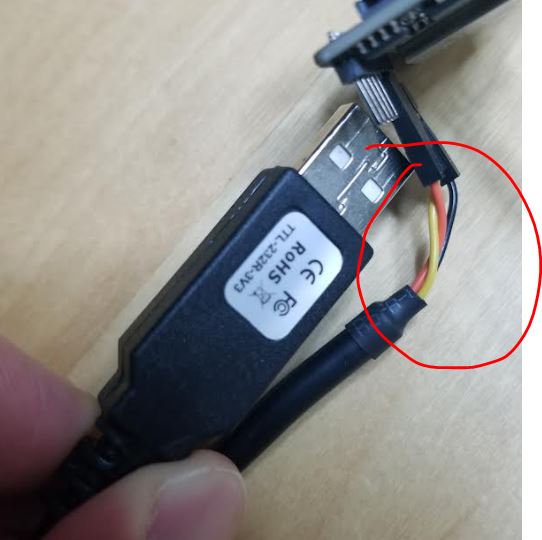
Find an FTDI cable and identify the functions of the wires with
different colors. Ours only has Orange, Yellow and Black which are TXD,
RXD, and GND respectively. (Yes, no VCC)
Apparently, the VCC cable is a DC voltage supplier from the USB.
On
Page 47 of the textbook, it shows the hardware connection between
FDTI and ESP32-CAM. We uses a different FDTI cable so VCC doesn't
exist. The VCC line from the board in the following figure is a 5V DC
to supply power to ESP32-CAM. Our cable doesn't have a 5 V line so you
can use anything that can provide a good 5V DC to the ESP board. For
example, you can use the 5V/3.3V module available in the lab or use an
arduino board to supply 5V to it or use a battery. Just don't forget to
ground everything to the same node.
IO 0 needs to be shorted to GND when you
program the board. In addition to that, you need to press the Reset
button to upload the code to the ESP chip. When the code is uploaded,
you must disconnect IO 0 from GND to enable the chip.
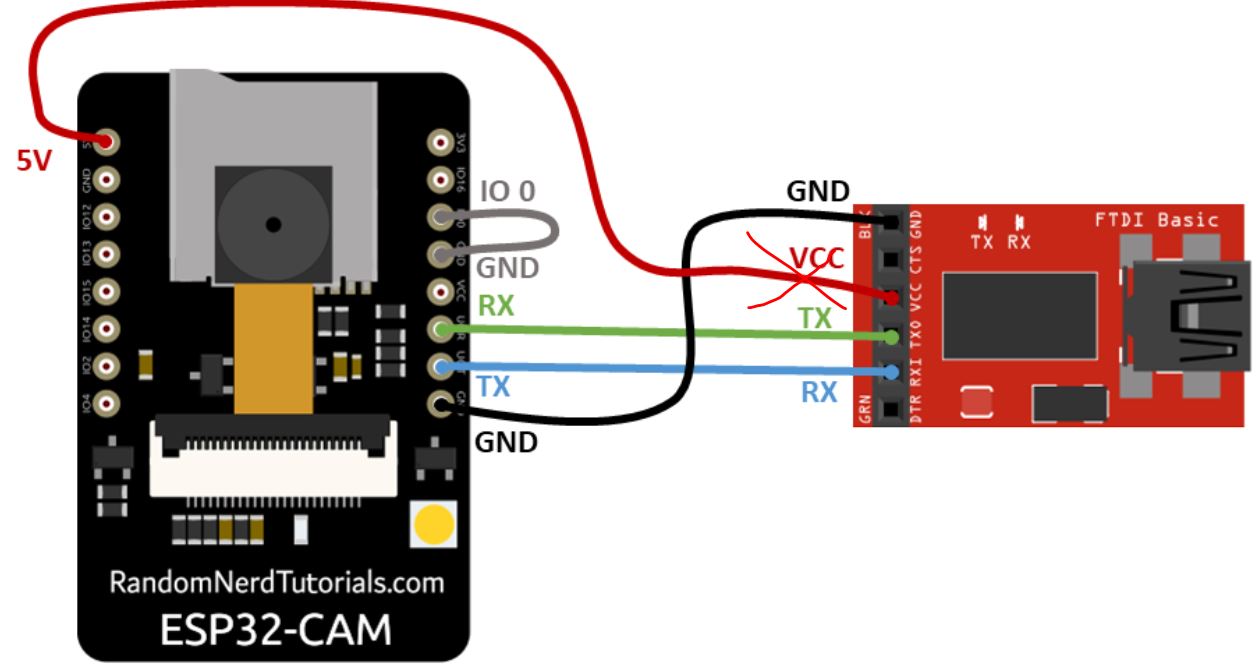
(A figure from Page 47 on the textbook)
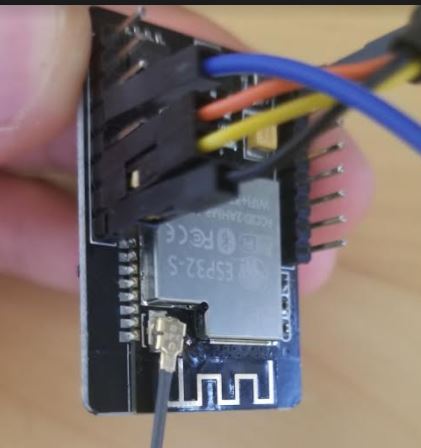
The onboard antenna doesn't perform well when streaming videos. An
external antenna is recommended. You must de-solder the resistor and
rotate it to the other two surface pads. Please read Page 32 if you have any questions.
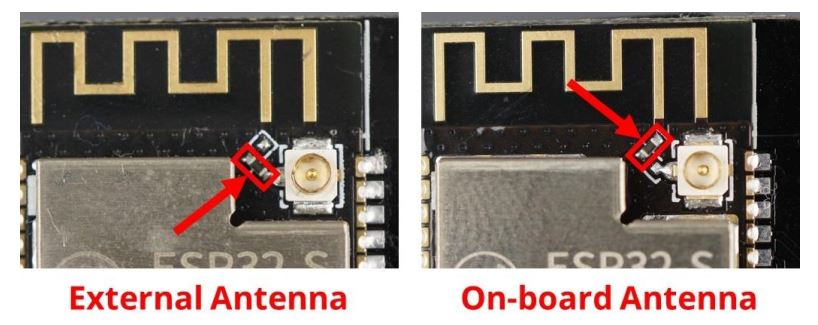
(A figure from Page 32 on the textbook)
Please note that the resistor is a 0 ohm resistor, you can also simply
short the two pads to make it work. You cannot use two antennas at the
same time.
Task 1. The first example (40 points)
From Examples - ESP32 -
Camera - CameraWebServer to open the example code. You must save the
sketch to a location on your hardrive without changing the original
library.
Change the WIFI credential (Page 46) and uncomment the camera model (Page 46).
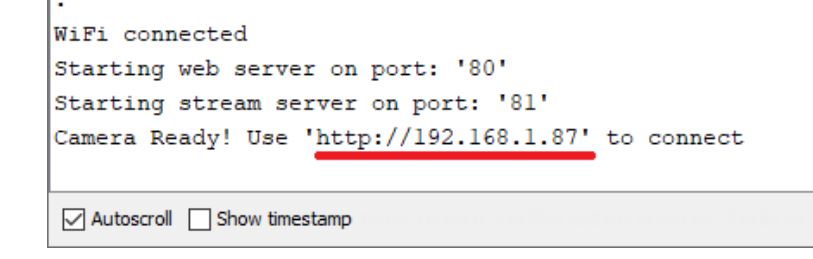
Use serial monitor to find
the IP address of the ESP webserver. Copy and paste it into the address
line of your browser. You'll see an interface with gadgets on the left in the browser's window. Click
'Start Stream' to see the live video stream from the camera. If you use
the antenna on the board, the video will be buffering very often due to
the limited bandwidth.
(A figure from Page 50 on the textbook)
(I couldn't even have a live video stream using the PCB antenna. Using the individual antenna is highly recommended)
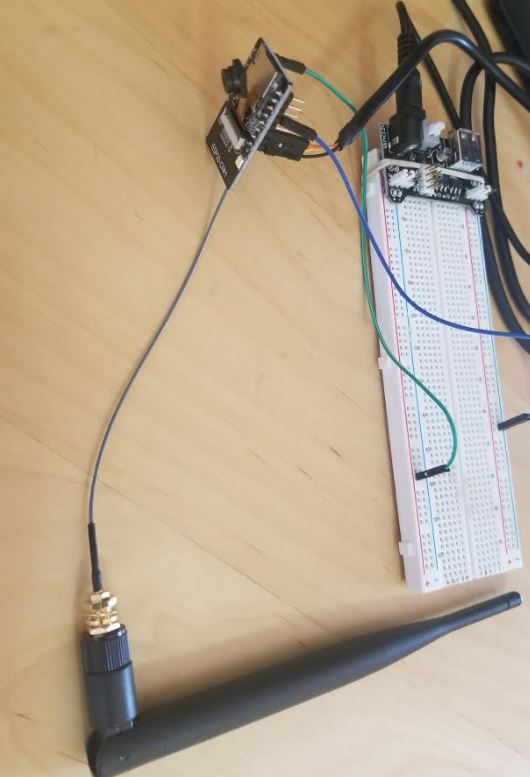
I desoldered the small resistor and
rotated it as indicated in the textbook. I attached the antenna to the
socket then I was able to see live video stream even at the highest available resolution.

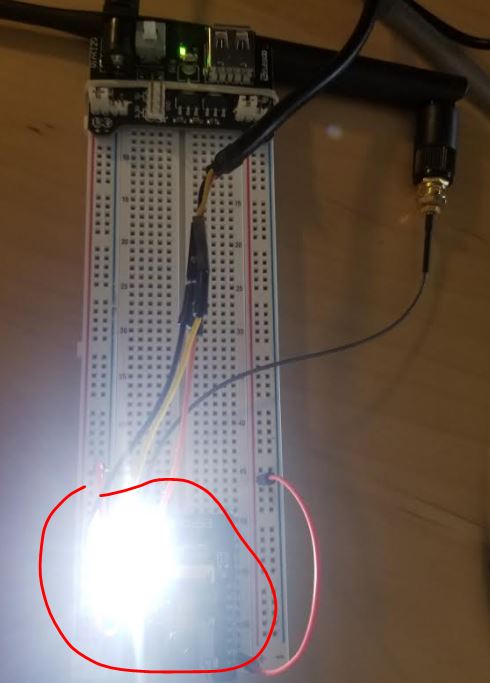
Here is the sloppy connections on the breadboard. (I was still testing the board so I didn't solder it on a PCB).
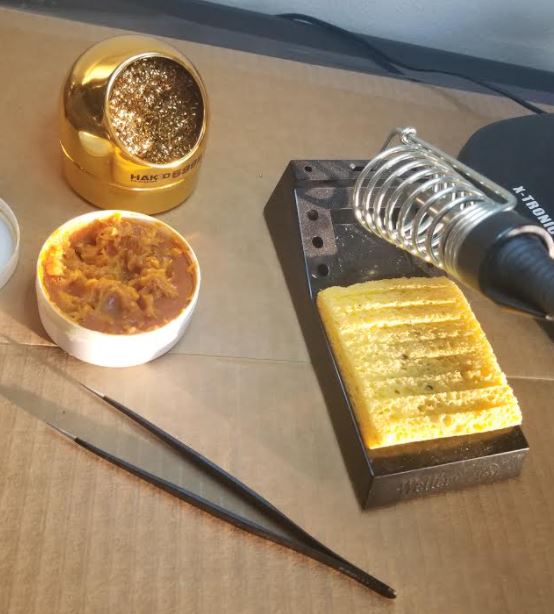
** Tricks on desoldering the small resistor.
You need the solder paste and
a special IC twizzer to do the job. Apply a little bit solder paste to
the resistor. Use the iron tip to grab a little bit solder to the tip
and cover the resistor by the solder. The solder on the tip is hot
which helps heat up the two ends of the resistor at the same time so
you can smear it away from the pads. Do not push the resistor too hard
since it will damage the pads and make the ESP chip useless.
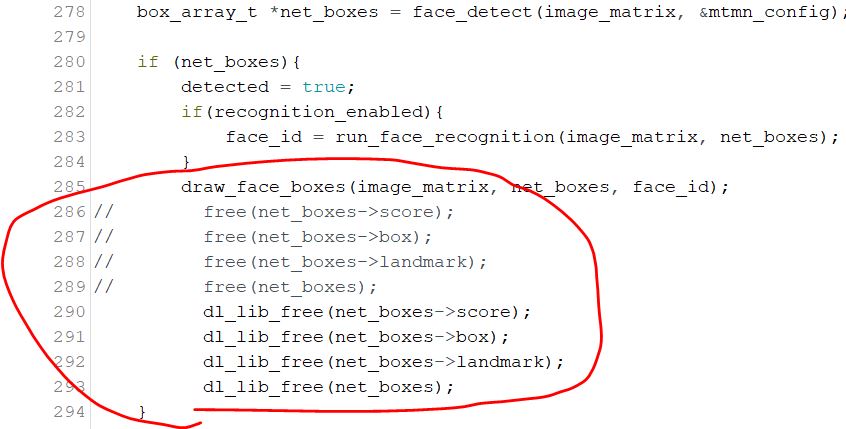
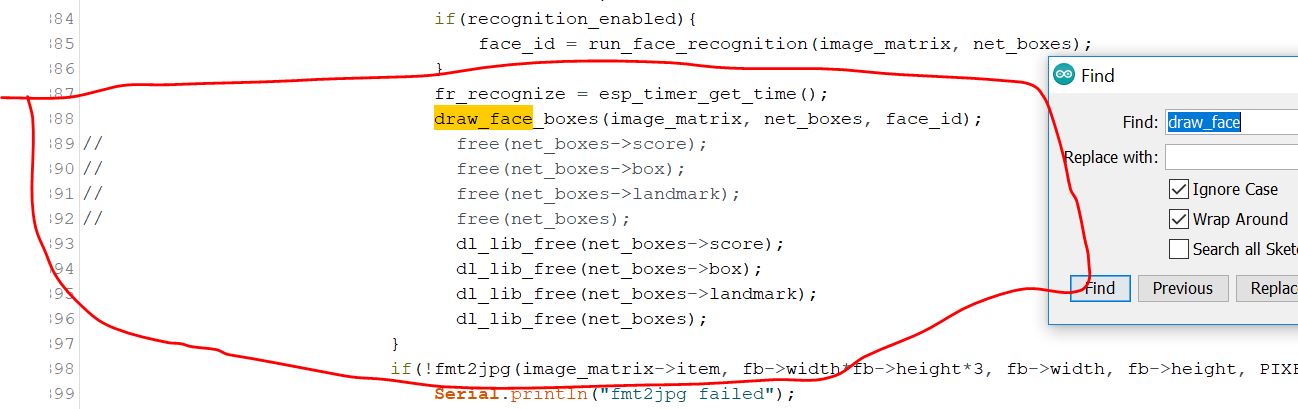
Face Detection
The example from the
'CameraWebServer' example doesn't work for Face Detection. In the
'app_httpd.cpp' file, find the following two locations and replace the
'free()' functions with 'dl_lib_free()' functions. This simple change
will prevent your ESP32-CAM from rebotting when you toggle the 'Face
Detction' switch in browser. Use 'ctrl + f' to search for the
'draw_face_boxes()' function in the script, then make the corresponding
changes inside the function. There are two locations need to be
revised.
Replacing the relevant free
calls with dl_lib_free as follows eliminated the corrupt heap issue for
me. Be sure to apply it in both the 'still' and 'streaming' portions of
the code, as applicable. This solution was found from this thread:
https://github.com/espressif/arduino-esp32/issues/5128
Results
It should be able to draw a box around your head.
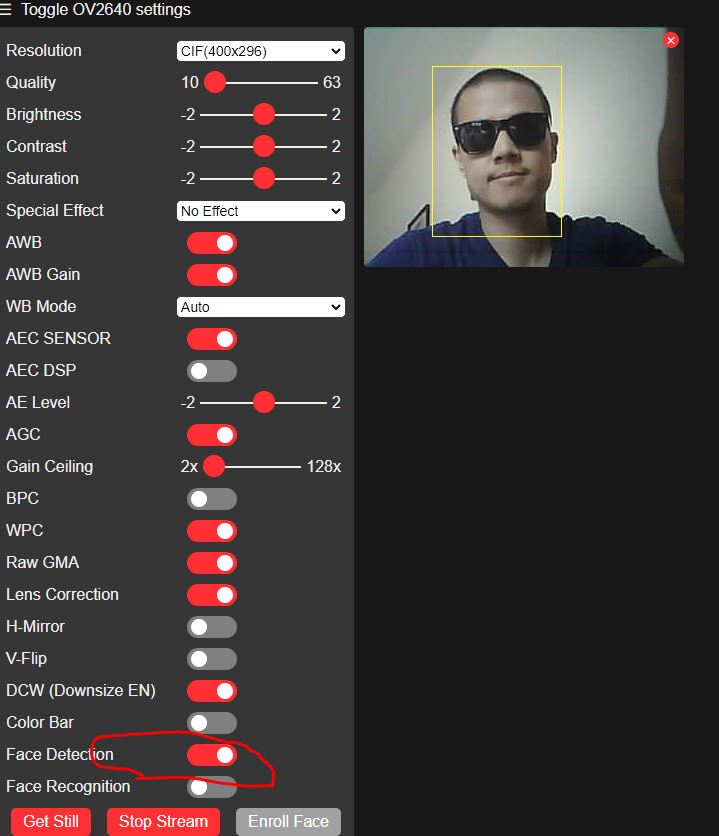
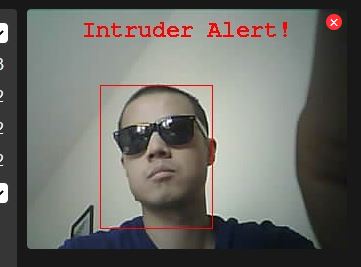
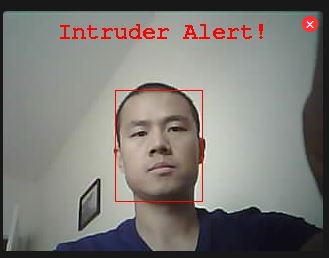
I haven't enrolled my face into the system so it shows my face is an 'Intruder' after I toggled the 'Face Recognition' switch.
Click 'Enroll Face' once, the
camera will sample a few frames of you for future recognition. Then
reboot the streaming by clicking 'stop stream' and 'start streaming',
you will see that your face is recognized by ESP.

I removed my sun glass and I was recognized as an Intruder again.
Task 2. Control the flash light and the GPIO pins (40 points)
As other microcontrollers,
you can definitely control the GPIO pins of the ESP-CAM board. Let's
run some examples and we will wrap up this tutorial.
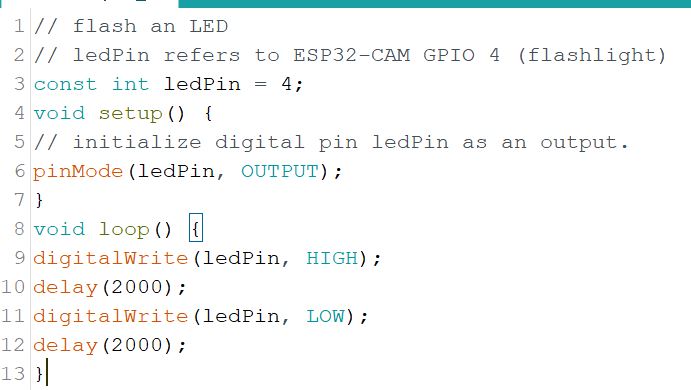
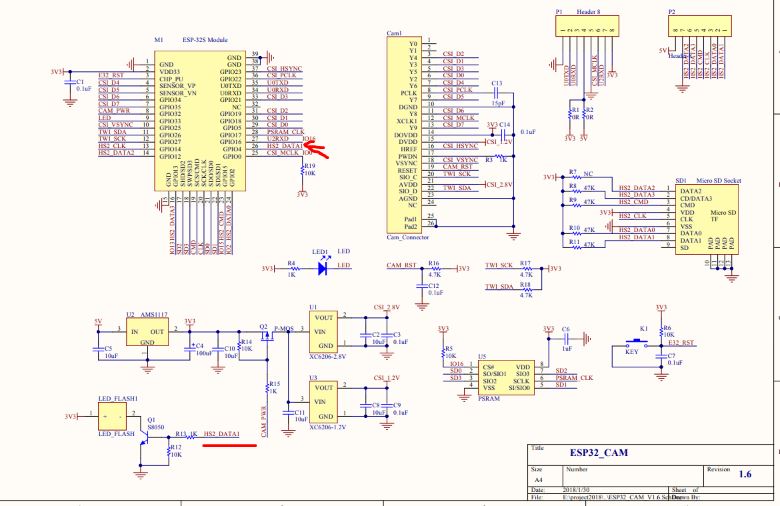
Refer to the schematic of the board the HS2_DATA1 pin (GPIO4) is connected to the flash light. Use the following code to blink the flash light:
The flash light is super
bright, do not look at it directly while it is blinking. After you have
uploaded the code, you must disconnect IO0 from GND to enable the
operation.
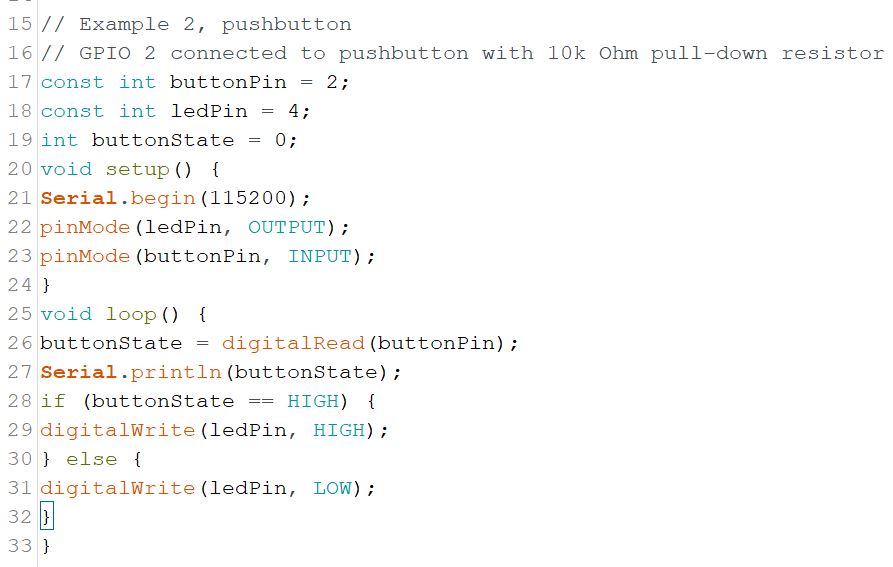
Add a push button and
pull-down resistor to the circuit. Use GPIO 2 to receive the signal
from the pushbutton that controls the flash light.

(A figure from the textbook by Rui Santos)
Use the following code from Rui for this circuit.
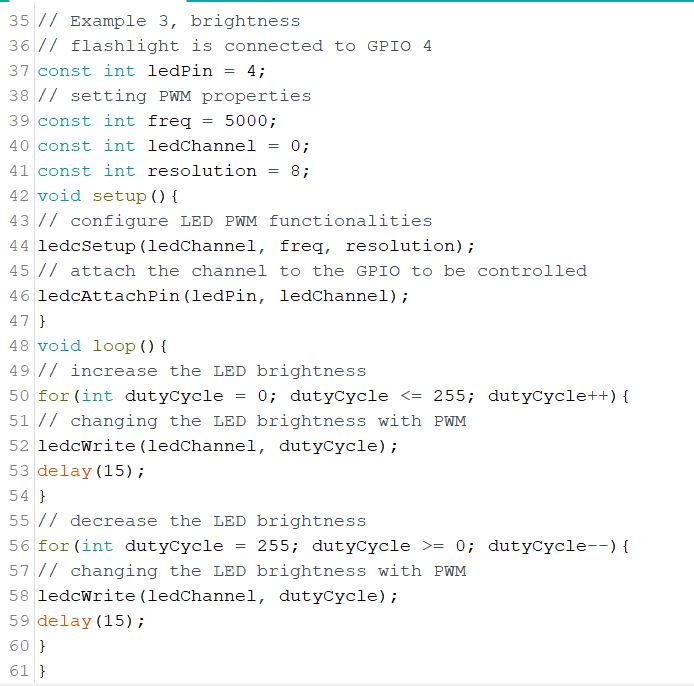
Next, let's use a simple
sketch from the textbook to control the brightness of the flashlight.
You may have the solution for it already - yes, use PWM. (again, do not
look at the flash light directly. Wear a sun glass if you have one with
you).
Task 3: Report writing, editing, and submission (20 points).
---- This is the end of the tutorial