CE 432 Robotics II Fall 2021
3D Printing Workshop
Sean Eaton
smeaton@fortlewis.edu
3D Printing Workshop
Introduction:
For this assignment we were tasked with learning
the 3D printing process so that we will be able to print the necessary
components for a future assignment. After Noah presented a brief
overview of the process we then followed his tutorial which covered
using Solidworks and creating the 3D model of the part. Then, using
Cura, the necessary G-code was generated and placed onto a micro SD
card. The Monoprice Maker Select 3D Printer v2 was then used to finally
print the part. The final printed part is then able to be used to as
part of the Two-Wheel Balancing Car project later in the semester. The
purpose of this part is to hold an Arduino Uno securely on top of the
self balancing car.
Task 1: Using Solidworks
In task 1 it was necessary to install
Solidworks first which can be done using the Fort Lewis SkySoft
webpage. After installing Solidworks a new part was created using
millimeters as the units.
Next the sketch tab was used to create a
rectangle with the x dimension being set to 16 mm and the y dimension
being set to 14 mm. A circle was then placed in the center of the
rectangle with a radius of 3 mm. This shape was then extruded to make
the main shape of this part. Following this more portions of the shape
were extruded to end up with the final model of the part shown below in
Figure 1. The longer rectangle near the bottom scretches across the
whole main block and is 4 mm tall. The next smaller extrusion is 3 mm
wide and the extruded cylinder is 6 mm tall.

Figure 1. Screenshot of the final model of the part created in Solidworks.
Task 2: Using Cura
After
creating the part's model in Solidworks the file was saved as an STL
file. The next step was to download the Ultimaker Cura software. The
Cura software is able to generate G-code which is basically a set of
instructions so that 3D printers can understand how to print the actual
part. When starting up the Cura software you are required to specify
the 3D printer you are using. The 3D printer available in the Robotics
II lab was the Monoprice Maker Select 3D Printer v2. The closest option
in Cura I found was the Monoprice Select Mini v2 which was compatible
with the Monoprice printer in the lab.
The STL file was opened in
Ultimaker Cura where the part was able to be rotated and moved so that
it would be printed in the front left corner of the printing bed. After
positioning where the part will be printed it can then be "sliced"
which returns a G-code file that can be saved.
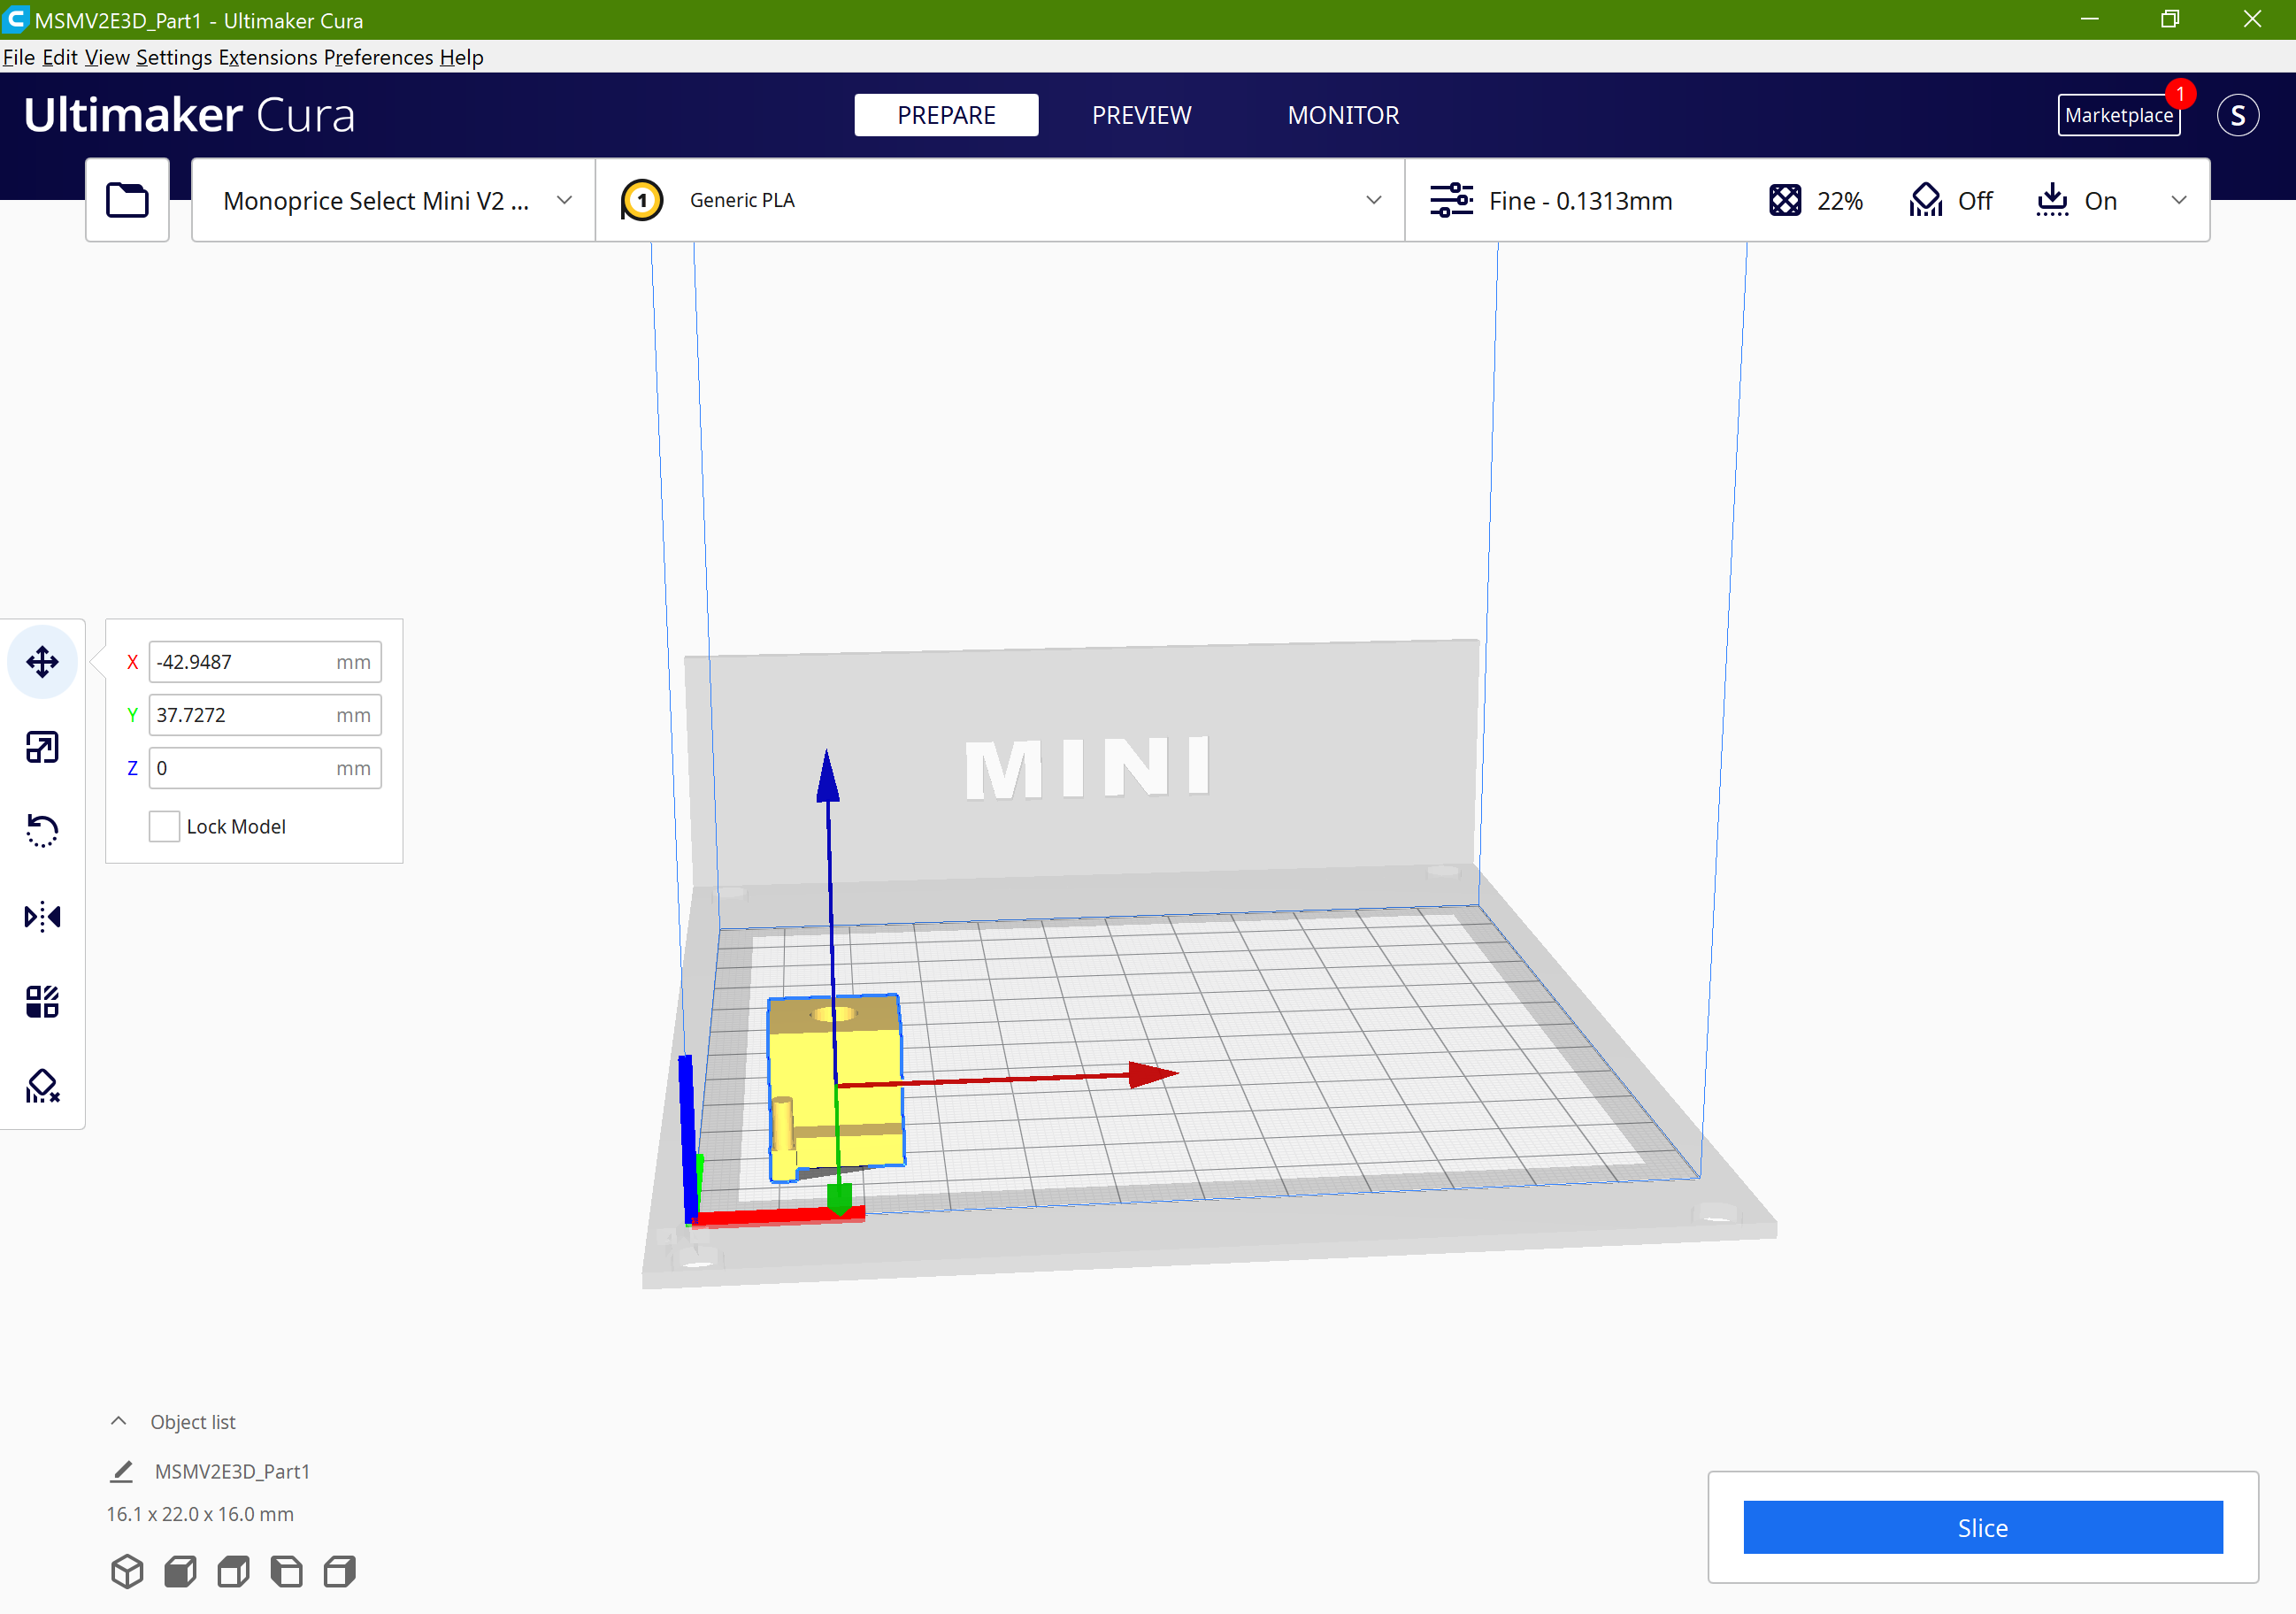
Figure 2. Screenshot of the Ultimaker Cura software used to generate G-code for the 3D printer.
Task 3: Printing the Part
After
saving the G-code file to a micro SD card, it was then inserted into
the 3D printer and the file was selected to print. Prior to this the
printer bed was cleaned up and some adhesive from a glue stick was
applied to the printing area. A picture of the completely printed part
is shown below in Figure 3. A clearer picture of the part can be seen
below in Figure 4 after removing the part from the printer bed.

Figure 3. The completed 3D printed part on the print bed.
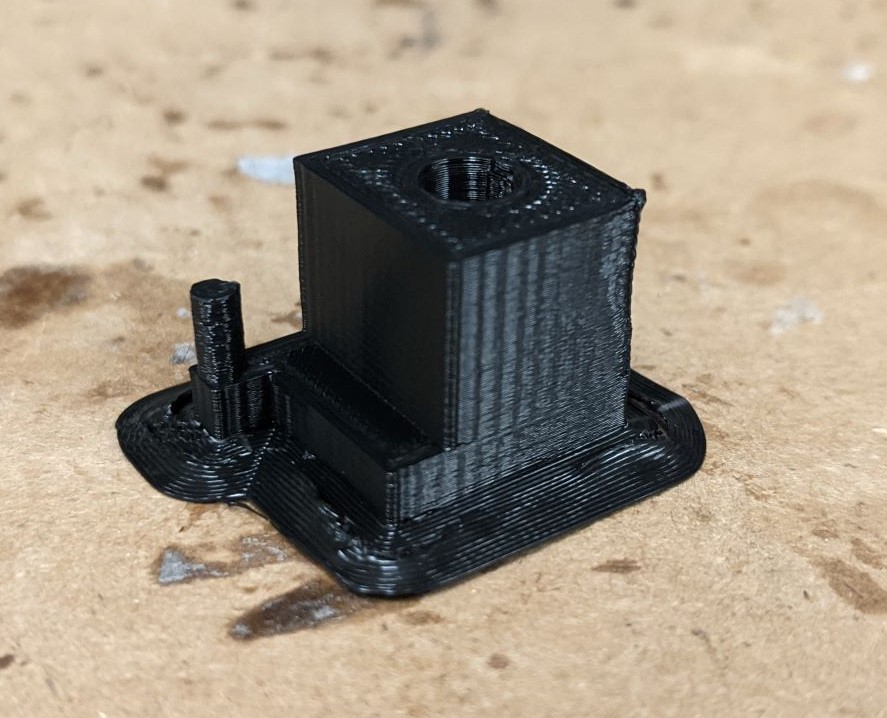
Figure 4. A closer look at the completed 3D print.
After
removing the part from the printer bed I removed some of the excess
material that can be seen in Figure 4 above. I compared the completed
part to the part currently on the self-balancing car in the lab. From
observation my part looks to be pretty much identical to reference part
which is great to see.

Figure 5. Comparing my part to the reference part on the self-balancing car.
Conclusion:
I enjoyed this assignment a lot since I have always
been interested in 3D printing since I learned about the technology
many years ago. I wasn't sure how to start and I appreciated Noah's
tutorial on the process since it was so straightforward and simple. I
had no experience using Solidworks prior to this assignment and while
it was frustrating at times I am looking forward to experimenting with
the software more. The main issues I had were figuring out how to
sketch on various parts of the model and editing the parameters since
they were minimally labelled. After completing the Solidworks portion
of the assignment it was very straightforward getting the G-code file
on the printer and getting the print process started. I am looking
forward to using this technology more and I wish I knew how to go about
this process a lot sooner than now.