CE432 Robotics
II
Fall 2021
Tutorial 6: HW6
Humberto Arredondo
harredondoperez@fortlewis.com
HW6
1.- Introduction
In
this lab we developed 6 different task using Arduinos, stepper motors,
different modules, encoders, and some calculations that involved
Wheatstone Bridges.
The equipment and materials used for this tutorial was:
Power Supply
Breadboard
A4988 module
MPU6050 module
Joystick
Arduinos
Open-Smart 2.4 GHz transceivers
Nema 17 stepper motor
Jumper cables
Banana cables
Ociloscope
Signal Generator
Buzzer
2.-
Methods and Results
Task1
For
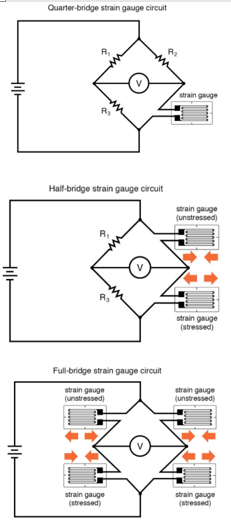
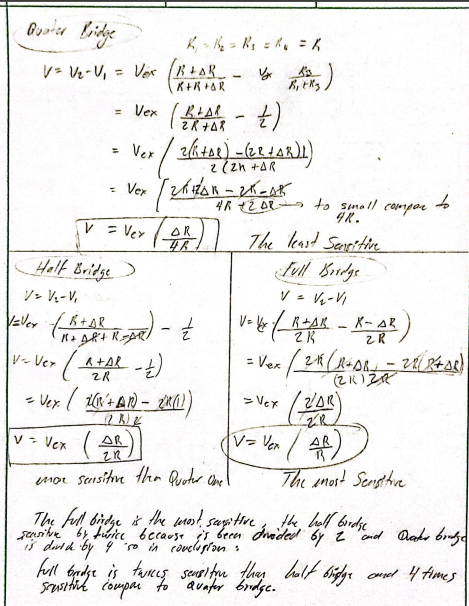
this task, we learned about Wheatstone
bridge and their use to measurement resistance change in a strain
gauge. we did
calculations for 3 different types of Wheatstone bridges: quarter
bridge, half
bridge and full bridge. the sensitivity if half bridge is more than the
quarter
bridge and the sensitivity of full bridge is more than the quarter
bridge. Calculation
is show in Figure 1.
Figure 1. Hand calculations for sensitivity on quarter, half and full
bridge.
Task 2
In this task, we
use an Arduino uno kit to create a sketch that measures distance using
the HC-SR04 ultrasonic module without the SR04.h library.
Figure 2. Demonstration of the ultrasonic sensor functioning.
Task 3
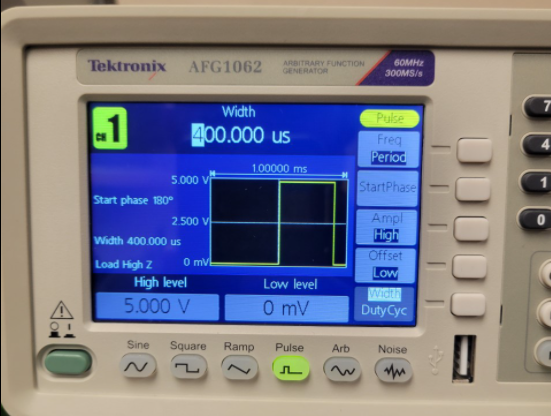
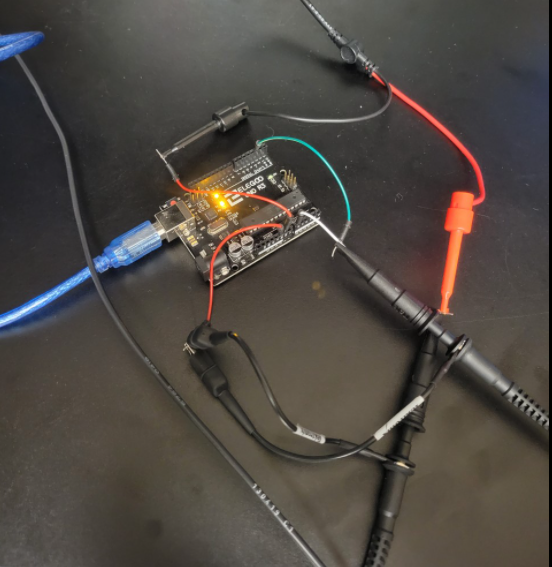
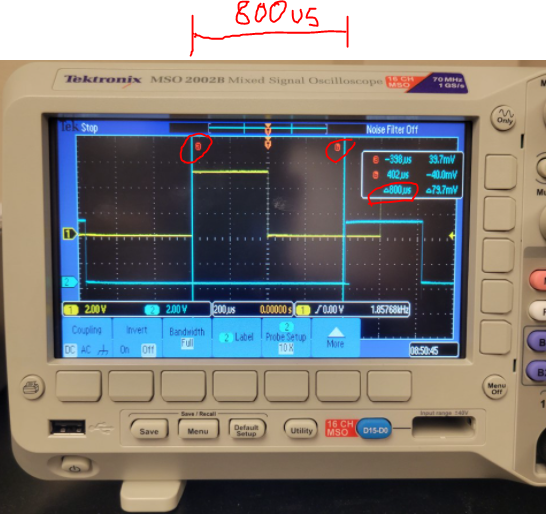
For this task, we designed a pulse detector using an UNO board with an
input of 5V. The challenge was to sense the pulse and deliver the same
pulse 800us later. On Figure 3, from left to right, the pulse created
in the function generator, the
connections of the cables. The last image in
the right shows the pulse created and the pulse been read with a delay
of 800 us.
Figure 3. Pulse created the connections and results.
Task 4
In task for, we
used the MPU6050, Arduino board and a buzzer to create a vibration
detector. The vibrations needed to be higher than a certain threshold to trigger the buzzer.
Figure 4.
Buzzer detector when there are vibrations.
Task 5
We used the
joystick of Arduino kit to control the speed of the NEMA stepper motor
and the Open-Smart 2.4 GHz module.
Figure 5.
NEMA stepper motor speed controller using a joystick.
Task 6
In this task, we analyzed the rotatory encoder and demonstrate the
function.
Figure 6. Encorer and Arduino UNO.
Discussion:
The overall experience on this homework set was to be able to practice
some of the techniques that we have developed over time, we realized
that we can pair up a sensor or controller device to a
microcontroller using the data sheets and make them work. The use of
stepper motor I think is useful to understand the basics of how
robotics works.