CE432 Robotics
II
Fall 2021
Final Project: Balancing Car
Humberto Arredondo
harredondoperez@fortlewis.com
1.- Introduction
In
this tutorial the students were assigned to create a self-balancing
robot car that uses two wheels. These two wheels needed to be rotate by
two step motors and controlled by an Arduino Uno module.
The equipment and materials used for this tutorial was:
DC to DC Power Supply (12V, 5V)
Breadboard
Two A4988 modules
Analog Joystick
Arduino Uno
Two Open-Smart 2.4 GHz transceivers
Two Nema 17 stepper motor
Jumper cables
MPU6050
Hardware
7.4 V Battery
3D printed parts
2.-
Methods and Results
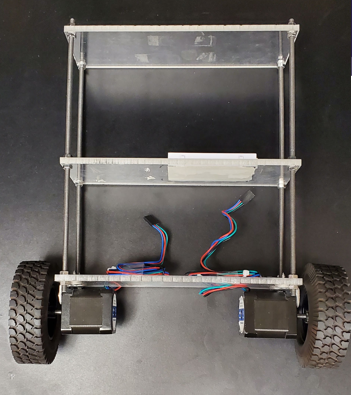
The
chassis of the car and assembly was achieved by cutting acrylic
boards and put them together using rods and nuts (Figure 1). 3D parts
were designed
and printed to hold the breadboard, batteries, and the step motors in
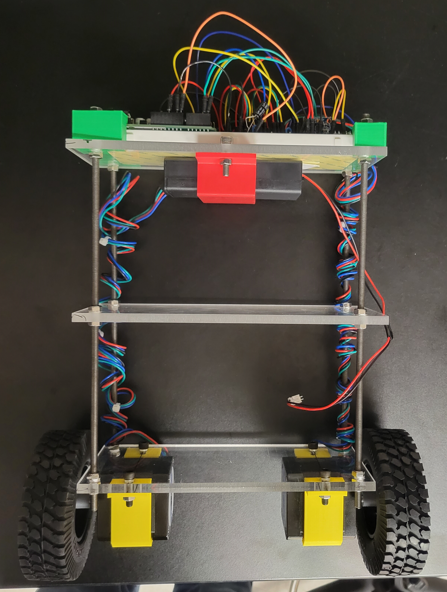
place. Once the chassis was completed, the Arduino, two A4988 modules,
and the MPU6050 were added (Figure 2).
Figure 1.
Complete chassis and stepper motors assembly.
Figure 2. Complete self-balancing car wired up.
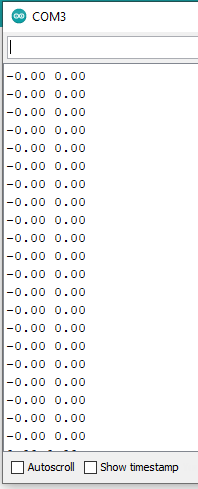
The
A4988 was calibrated first (the value was -1911). In Figure 3,
the first column shows the angle and the second column represent the
error.
Figure 3. Serial monitor showing the calibration results of the A4988.
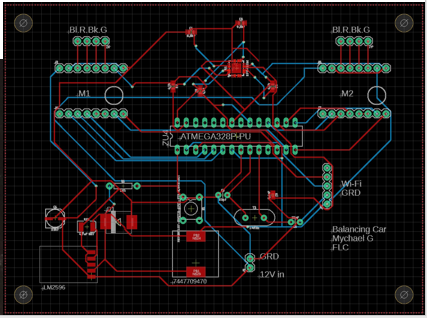
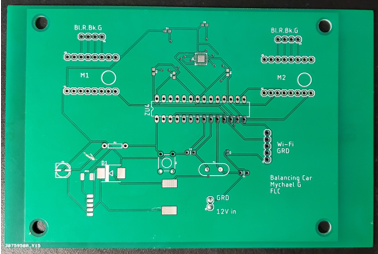
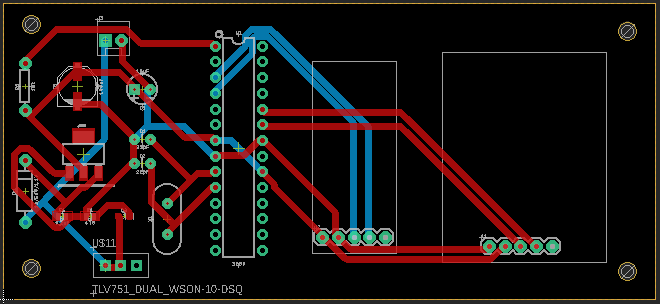
Two PCB for the car
were designed in Eagle. The layout and PCB for the car are shown in
Figure 4. The layout and the PCB for the remote control are shown on
Figure 5.
Figure 4. The
PCB design for the Balancing car designed by Mychael Garcia (team
partner).
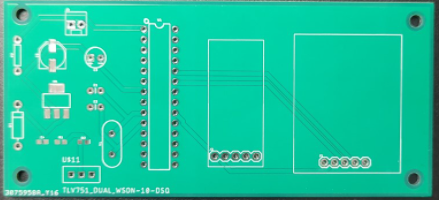
Figure 5. The
PCB designed for the remote control.
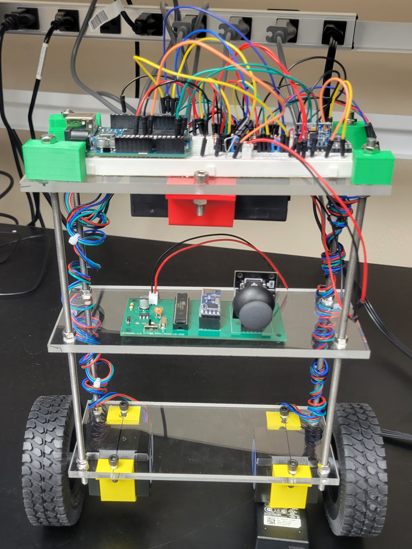
The final progress in this project is shown in Figure 6. The 3D parts
were printed in green for holding the breadboard, in red to hold the
battery, and yellow to hold the motors. In this occasion, the balancing
car project was not successful, they were many issues on the code. I
was not able to make the balancing car to stay balance myself. In the
other hand, my team partner Mychael Garcia was successful on his. Figure
7 shows a video of his car self-balancing.
Figure 6. Balancing car completed using the breadboard and showing the
remote control.
Figure 7. Balancing car in action.
Discussion:
This project required a big dedication in time, the skill for
programming were high. A full overall of skills were needed to
successfully complete this task. Skills such as coding, designing a PCB
in Eagle, knowing how to use datasheets for the modules, and the
ability of pairing all together. Unfurtunately, my car was not working
properly, some issues were: the motors kept on not going fast enough,
motors will keep on stop spinning and they sounded stall just to
mention some. For the future I will recommend to wait on the design of
the PCBs until all the issues have been taking care of and the actual
car is working properly.
Overall a great wrap up project where you put all knowledge to the test.