CE432 Robotics II
Fall 2021
Tutorial 1: ESP32-CAM Introduccion
Humberto Arredondo
harredondoperez@fortlewis.com
Using ESP32-CAM
1.- Introduction
In this tutorial the students were introduced to the ESP32-CAM module that, as
its name says it, it has a camera on it and it also has a microSD card
slot. The main two examples the studens exsecuted were to paired up the
module to the wi-fi so video streaming and face recognition could be
done using Arduino IDE and to blinked and dimmed a LED that is already
in the board.
The equipment and materials used for this tutorial was:
Power Supply
Breadboard
ESP32-CAM
FTDI Cable
Push Button
Jumper Cables
10k Resistor
External Antenna
2.-
Methods and Results
Task 1
For
this task, the CameraWebServer was followed. The ESP32-CAM was
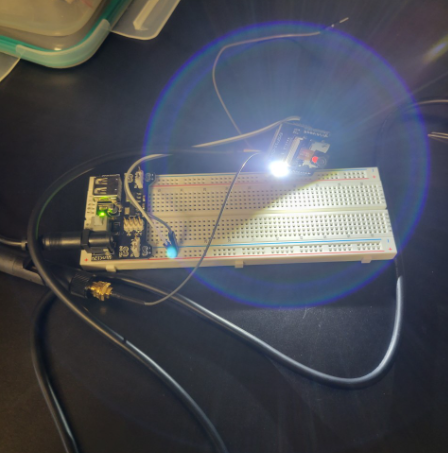
paired up as seen in Figure 1 to be able to connect to a WI-FI provider
so the
face recognition could be accomplished. Also, a IP address was needed to log the
right site where the streaming was showing in real time Figure 2.
The code provided in the tutorial had to be modified to use
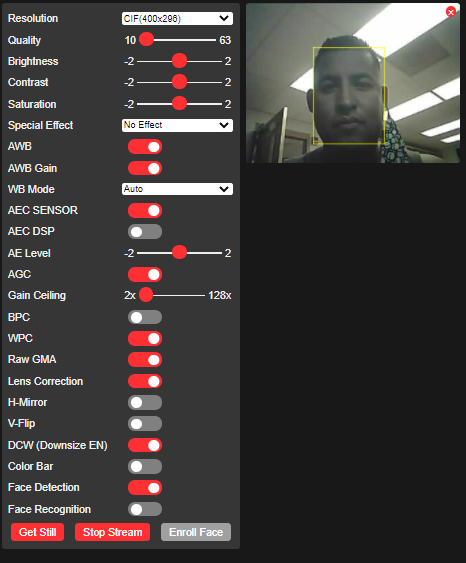
face detection and the tap for face detection was activated in Figure
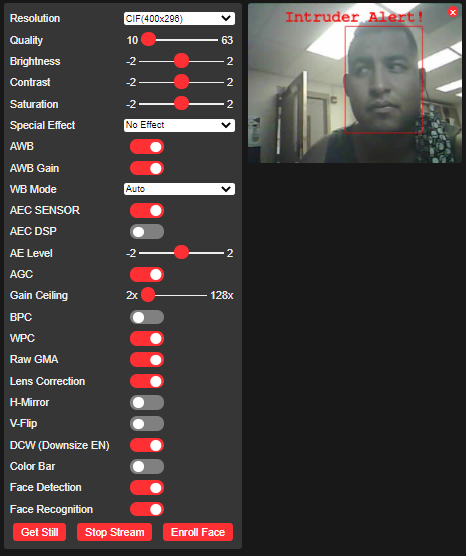
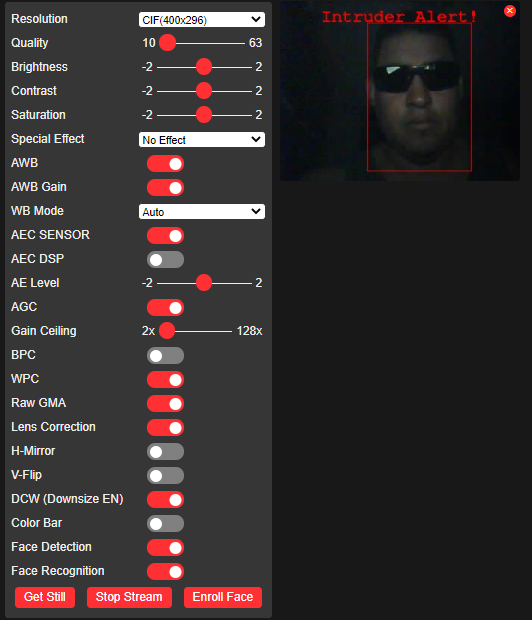
3. Once face recognition was activated (Figure 4), the server showed
intruder alert because the face was not in the data base of the server.
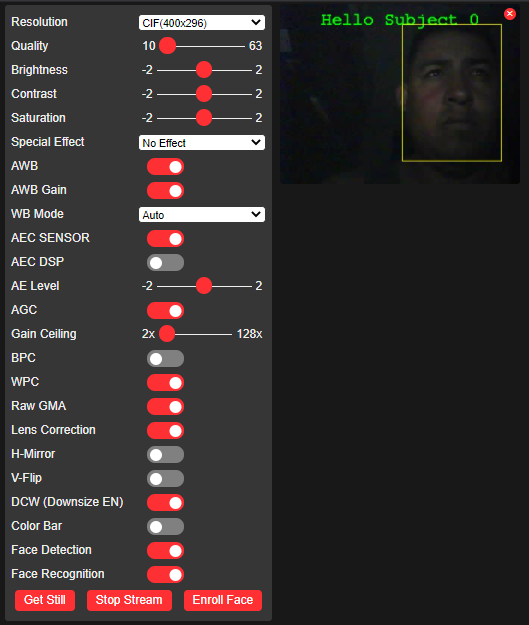
Figure 5 showed the fram after the new face was added. In Figure 6, the
power of recognition can be tested by covering the eyes of the subject.
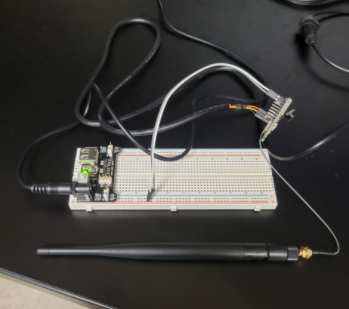
Figure 1. ESP32_CAM, an External Antenna and power supply using a
breadboard.
Figure 2. IP address obtained from the Serial Monitor once the code was
loaded to the ESP32-CAM.
Figure 3. Face detection function on.
Figure 4. Intruder Alert showed because the face was not save in the
server.
Figure 5. Shows Hello Subject
once the face was safe.
Figure 6. The server doen not detect the subject
if glasser are being wear.
Task 2
In this seccion of the tutorial, some
examples from the book were followed to asure that there some small
things that can be done with this module such as controll the blink of
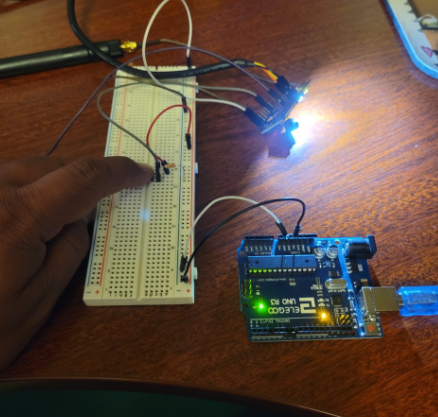
a LED. Figure 7 shows how to blinking light. Then, the same LED
was blinked using a push button (Figure 8), and after the code was
changed to make the LED brightness to change (Figure 9).
Figure 7. Blinking a LED using simple commands.
Figure 8. Blinking a LED using
pushbutton
Figure 9. Dimming a LED using
simple commands.
Discussion:
The main goal of this tutorial was to introduce the students to some
aplications for the ESP32-CAM, and show that it can be programmed using
Arduino IDE. How to stream real time video, and use the face
recognition of this module. Also the skills of soldering, follow
schematics and pair modules were used.