How to load the bootloader for new ATmega 328P U chips
(give credit to https://www.youtube.com/watch?v=3GTsB6GZAxY)
The 328p Dip chip
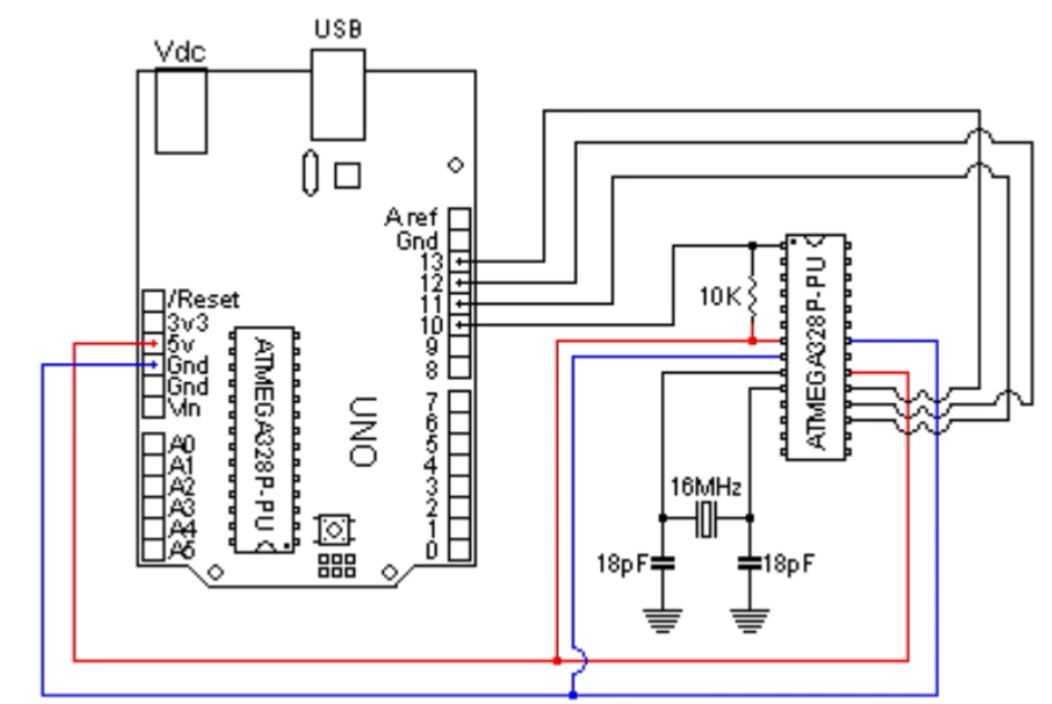
1. Put the new chip on a
breadboard, connect it to the parts listed below and an Arduino UNO
board with a functioning 328P chip.
The two caps can be 22pF or 20pF as well.
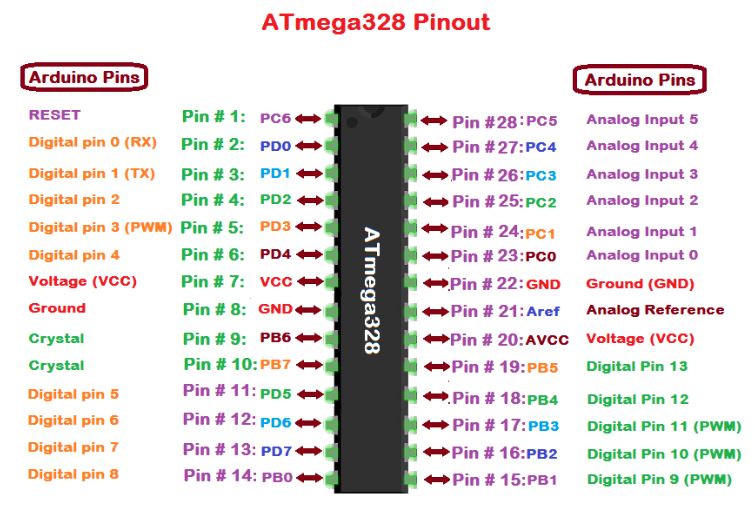
The pinout of the 328P chip:
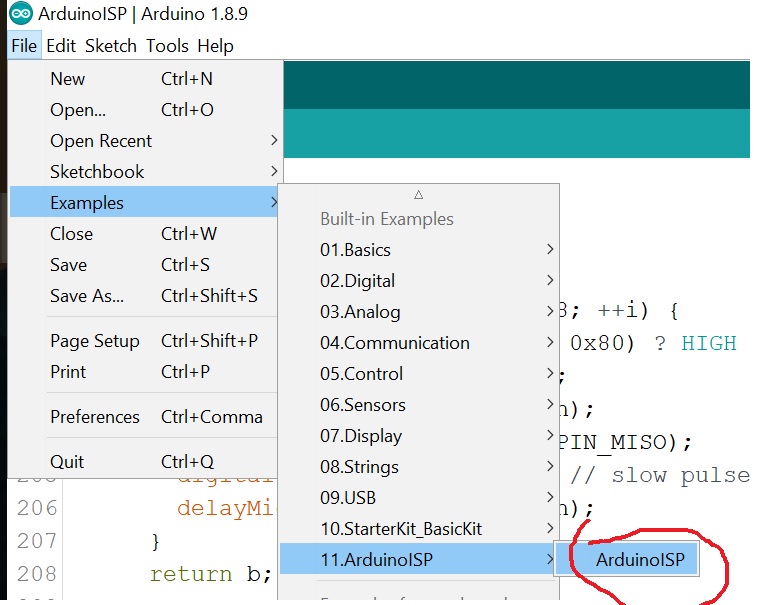
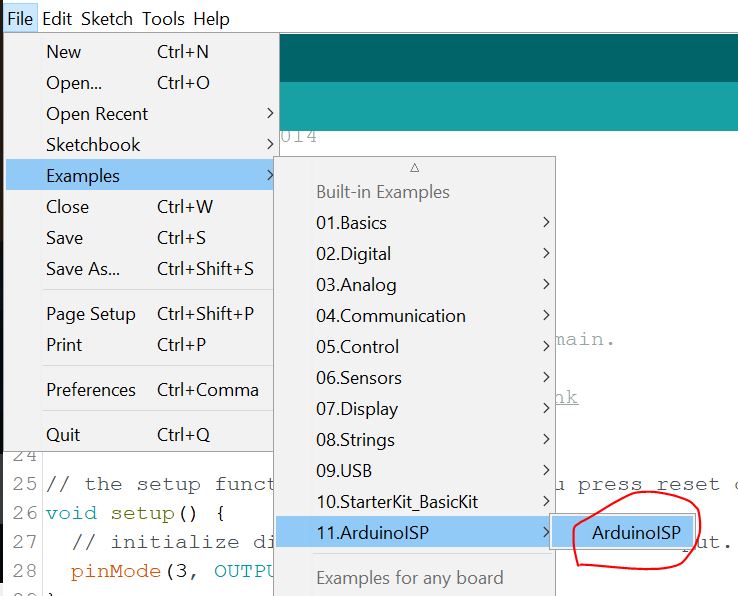
Go to File - Examples - ArduinoISP - ArduinoISP
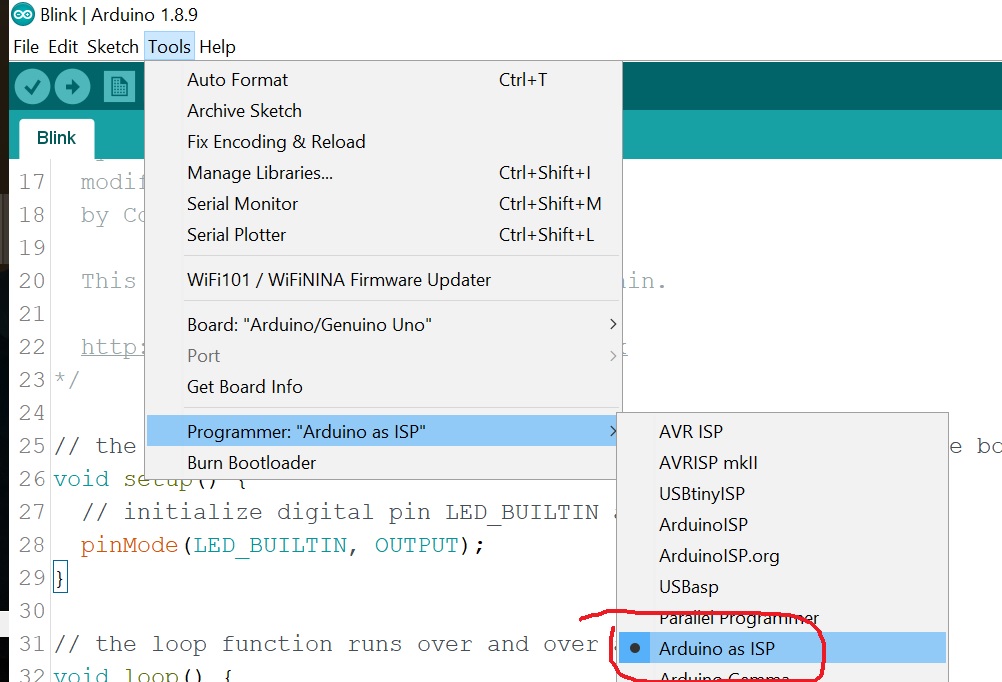
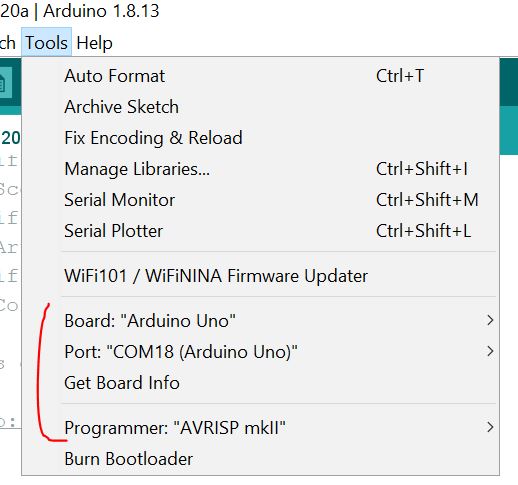
Also, make the following selections:
Finally, burn the bootloader:

After this is done, swap the
newly loaded 328P chip on the breadboard to the Arduino UNO board. Use
the 'Blink' example to test if the new chip can be programmed.
The Arduino Nano board
If your Nano board still doesn't work after following the instructions here,
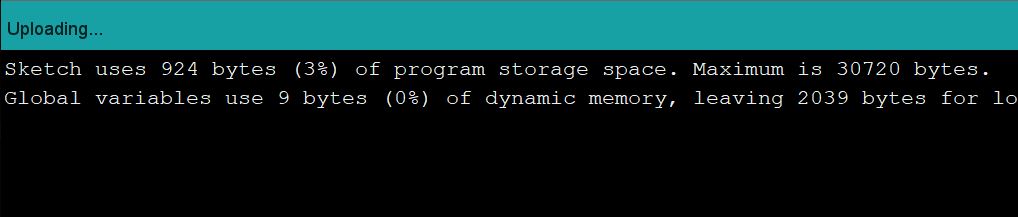
you need to burn the bootloader to your Nano board. The following
picture shows the issue. It will stuck in the 'uploading' status for a
while and then show the following error message.
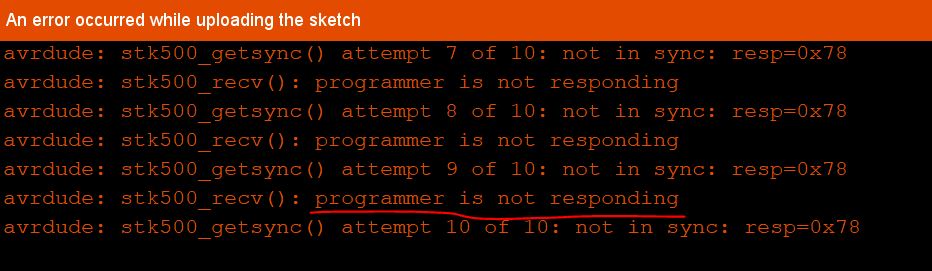
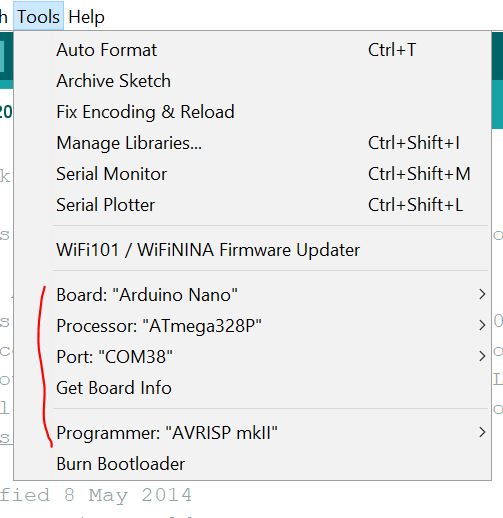
The following setting was used by following the instruction here and the error message above is expected.

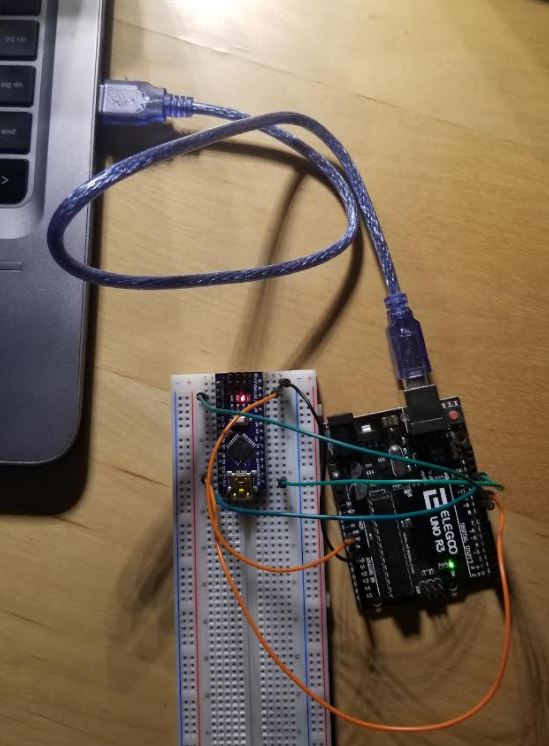
Now, let's use the UNO board to burn the bootloader to the NANO board. First, connect a functioning UNO board to your computer.
Use the following settings.
Find the Arduino ISP program from the examples' folder.
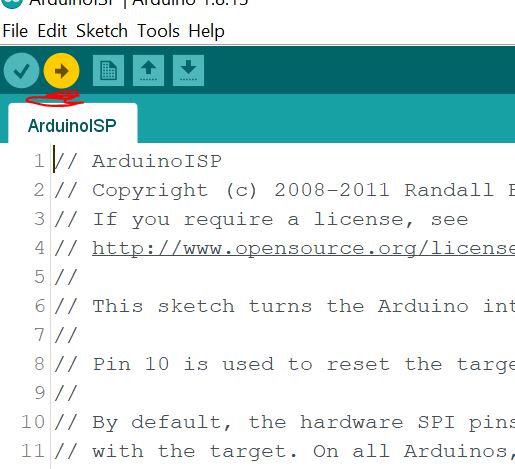
Upload it to your UNO board.
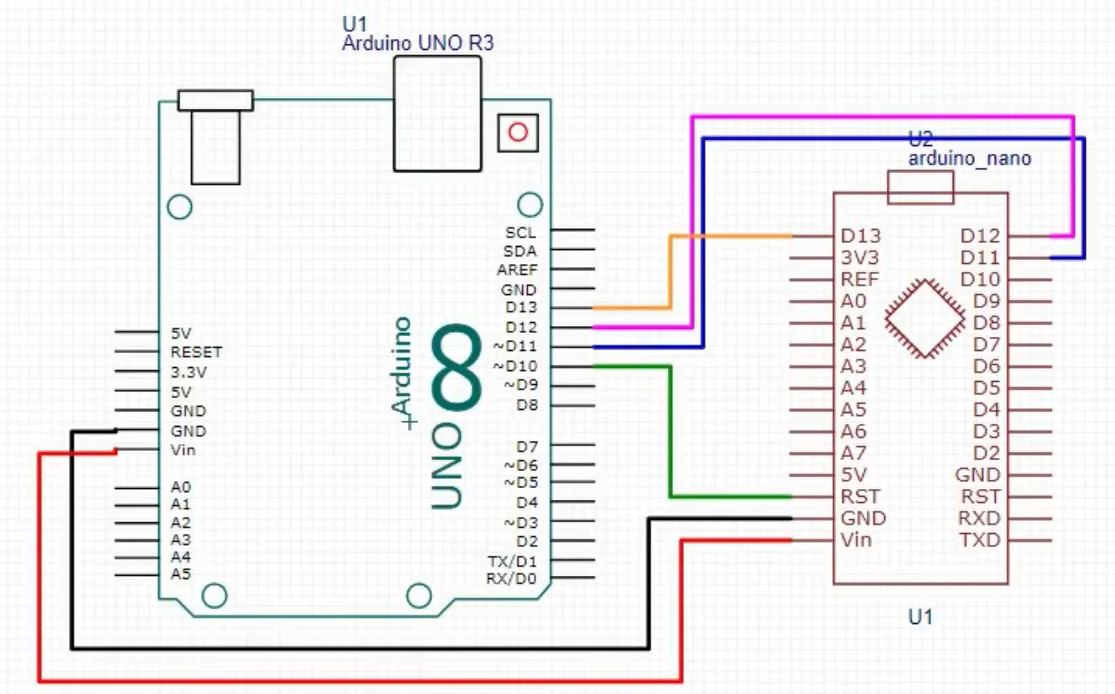
Make the following connections between your UNO board and your NANO board.
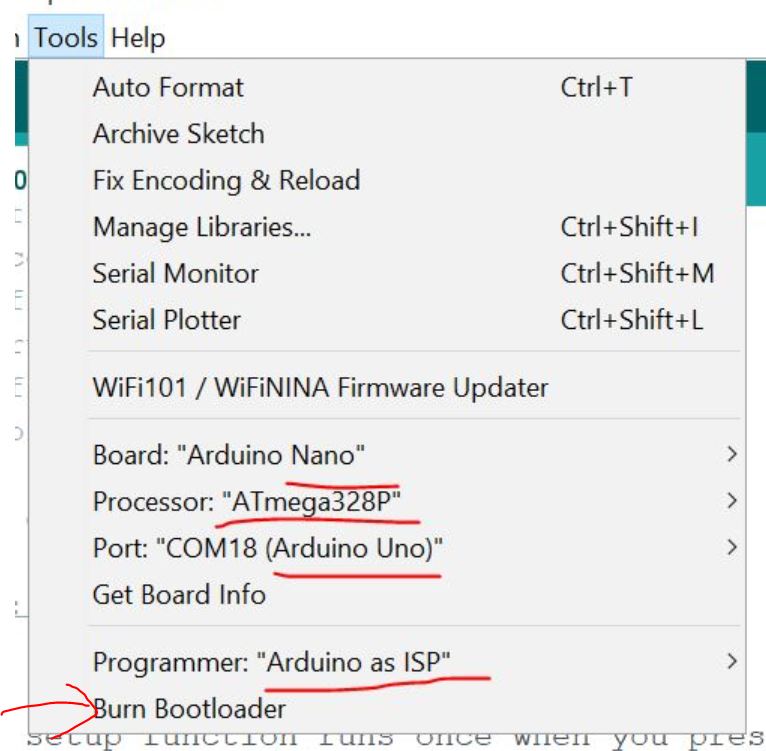
Use the following settings. Please note that the board setting is the
Nano board but you should have your UNO board connected to your
computer but not your NANO board.
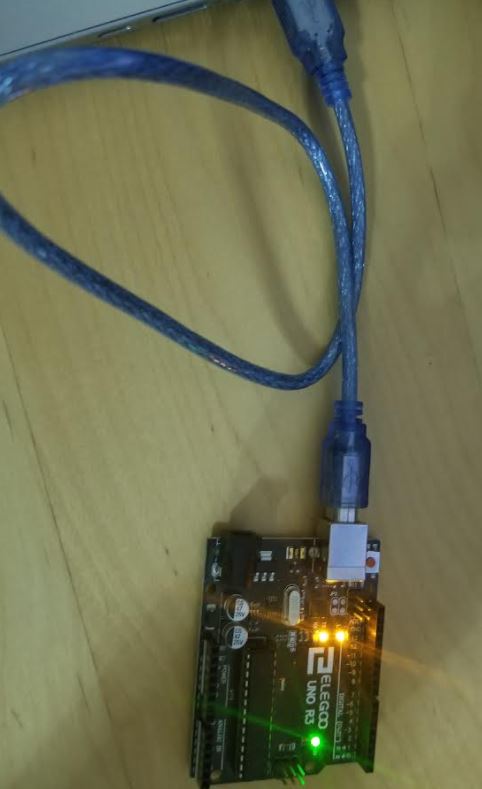
The following picture shows the connection before you burn the bootloader to your NANO from your UNO board.
If the burning is successful, you can unplug everything, connect your
NANO board to your computer to run the first blinking example.
----------------
References:
1. Burn bootload from Uno to Nano
2. Link to the CH340 driver